System Configuration (visible/modifyable for the system administrator ONLY)
An installed version of BACKCLICK on your own server is required for the first steps of system configuration. The installation is described in the chapter Installation in the manual.
After you have installed BACKCLICK on your server, you may start the system configuration of the software. Please note that we only describe the most important settings in this quickstart. More detailed information can be found in the chapter Installation.
Ask your administrator for the URL to login to BACKCLICK.
Please use Internet Explorer or Mozilla Firefox.
Our example uses http://doku.backclickasp.de/bc/.
Instead of “doku.backclickasp.de” use the URL provided by your administrator.
Username, Password, and Mandator
Upon delivery, BACKCLICK will have the super-user “bcadmin” with the password “bcadmin”.
You CANNOT delete this user. It will always be part of the standard mandator.
Please use the administrative user “bcadmin” for your first login:
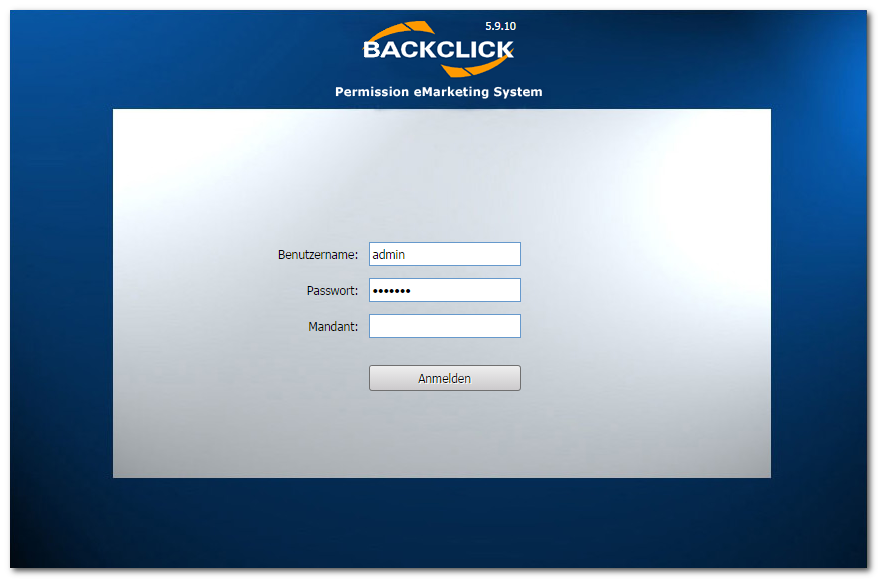
Figure 3.1 - Login screen
Username : bcadmin
Password : bcadmin
Mandator : <leave blank for default mandator>
If “access denied” or another error message appears, either your adminstrator changed the password or installation/configuration of the software has not been completed yet. Contact your administrator for the current password or the status of the installation.
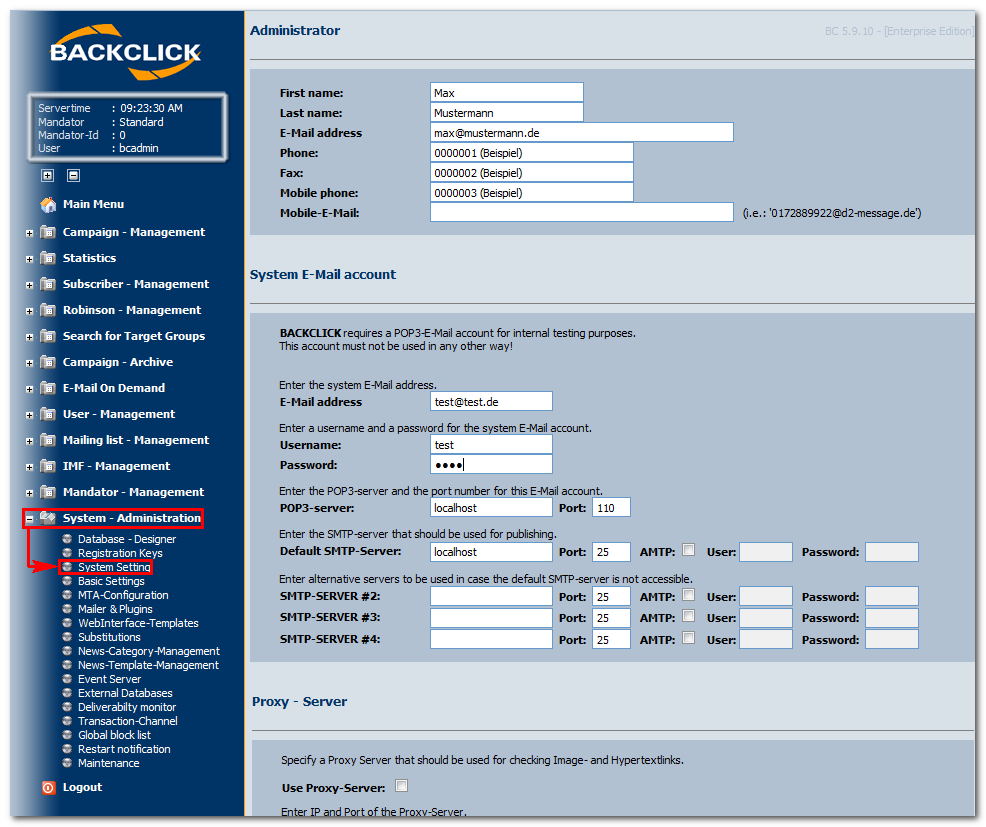
To start configuring , please click “System Setting” in “System-Administration” (main menu). The following mask will be shown (in delivery status):

Administrator
System E-mail Account
Enter the data of a POP3 postbox to be used for system internal checks. Fields for “SMTP Server #2" to "#4” are optional.
Proxy - Server
You may define a (HTTP) Proxy-Server here. In order to do so you have to confirm the use of a Proxy-Server once and provide this server in the field "Server-address". If no Proxy-Server is necessary leave these fields blank.
Initial IMF settings
Enter the initial settings of the intelligent E-Mail filter (handling of returned E-Mails) here. These settings define whether the E-Mails that could not be filtered should be forwarded to the administrator of the newsletter, either as an attachment to an IMF E-Mail, or forwarded as-is. In case you want to send the non-filtered returns (Bounce-Mails) as an attachment, you can define how many of these returns are supposed to be attached to a single, accumulative E-Mail to the administrator of the corresponding newsletter.

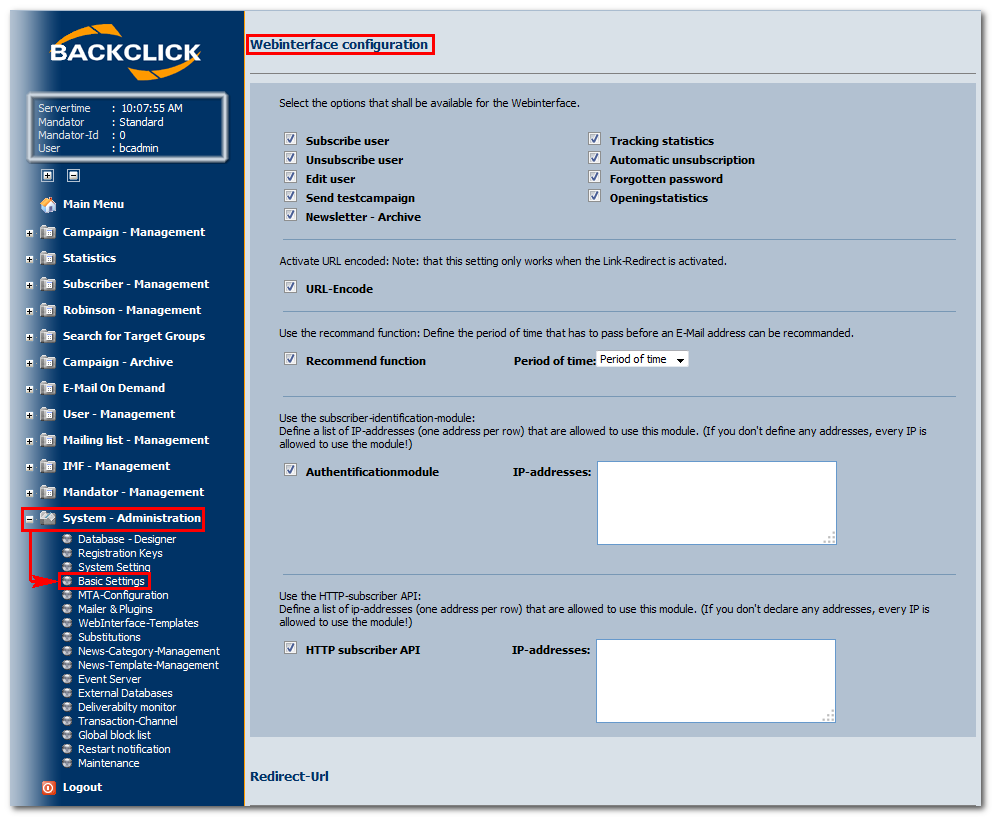
WebInterface Configuration
The WebInterface is an important component of BACKCLICK. It enables your subscribers to:
- Subscribe to a newsletter
- Unsubscribe from a newsletter
- Edit their personal profile
- Recommend your newsletter(s) to a friend
- Use the "Forgot my Password" feature
Some of these features can be disabled. For safety reasons it is also possible to set a password for all communications between WebInterface and server. The default password is “Webinterface”. You should only change it when absolutely necessary since it requires modifying a configuration file (web.xml) as well. The feature “recommend” allows your customers to recommend your newsletter(s) to a friend. Since this feature sends an E-Mail to the potential subscriber you should define a period of time before recommending the same E-Mail address is possible. Otherwise this feature could be abused for SPAM purposes.
URL-Encode
This function encodes links to UTF 8 in order to prevent browsers from misinterpreting your special characters. For example, if one of your links contains a link to another website, this link will be encoded.
This way http://domain.backclick.de?target=http://www.google.de is encoded to http://domain.backclick.de?target=http%3A%2F%2Fwww.google.de.
Authentification Module
HTTP subscriber API
The “HTTP subscriber API” enables you to manage creating, deleting and modifying subscribers via URL. It is possible to restrict access to this module to certain IP addresses for security purposes.
Mailer & Plugins
Use these settings to adjust:- The monitoring frequency, meaning how often you want to check for the necessity of a newsletter dispatch.
- Whether or not the IMF-filter (see Initial IMF Settings) should be activated.

After all settings are done and you want to save them, please click the "save" button. The "back" button will close the current view without commiting any changes and take you back to the Main Menu.
Default Settings (Visible to the system administrator and the mandator/user administrator ONLY)
In order to log in you have to go to the BACKCLICK homepage and enter your user data as described in System Configuration. Note: Your system administrator has to provide you with your username and password.
After logging in use the 'System - Administration' submenu 'Basic Settings' to display to the following editing view:
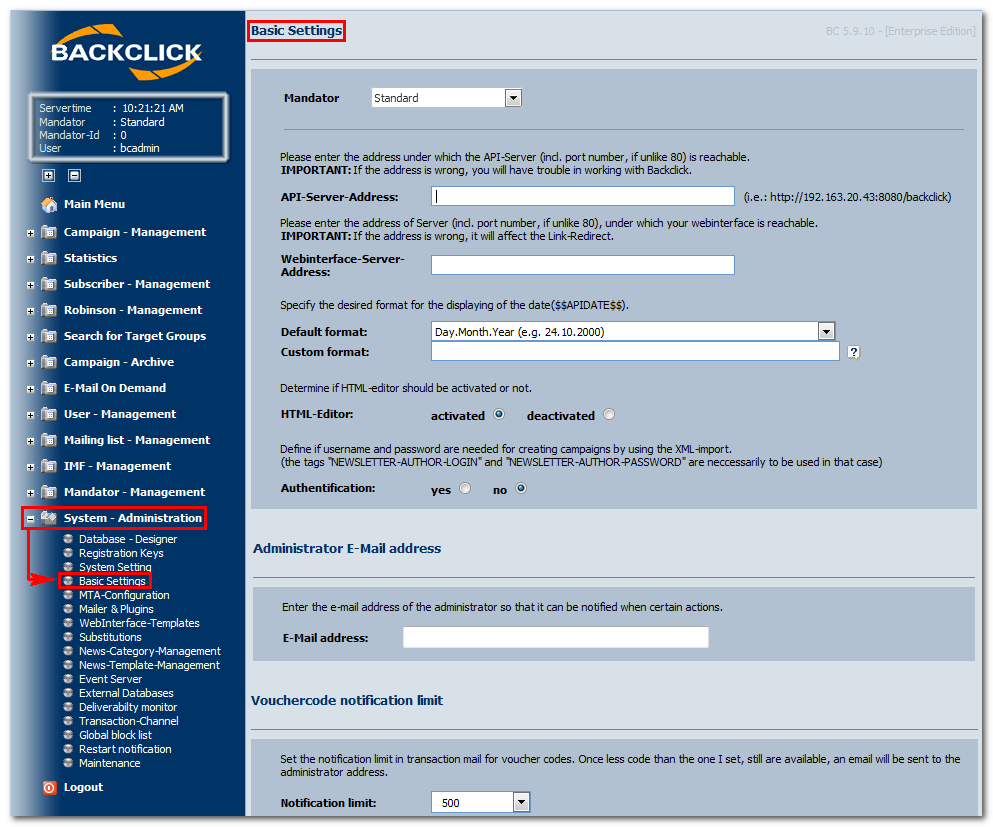
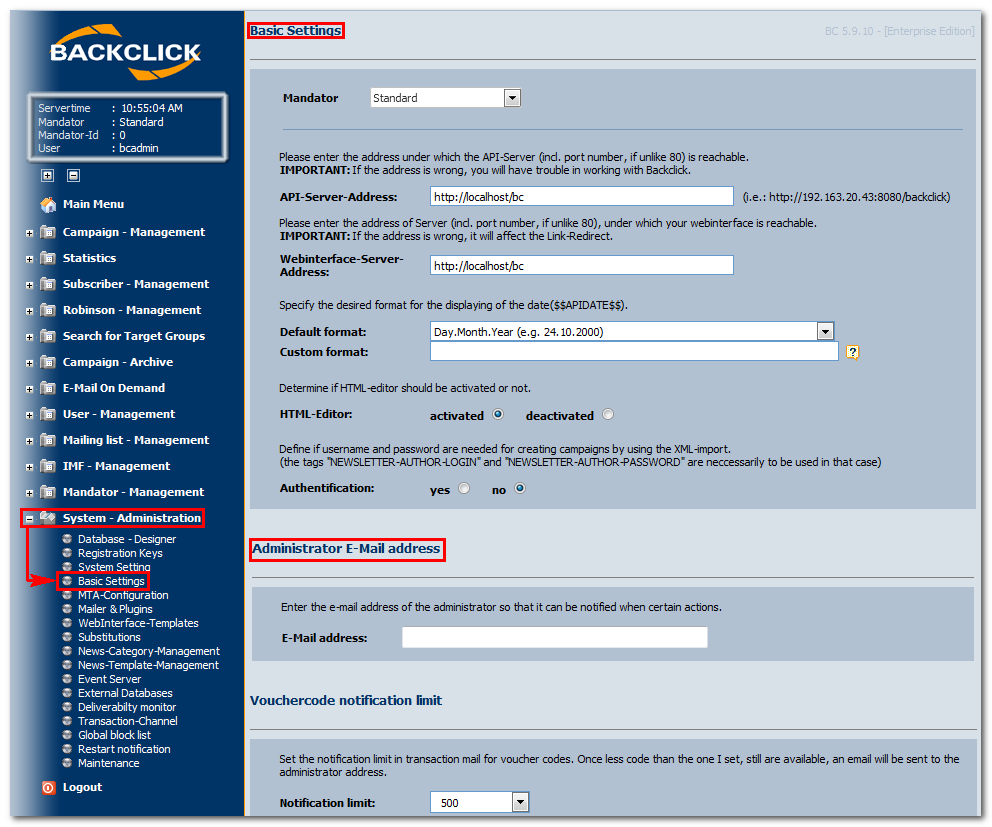
Mandator
This field is visible to your super-administrator only. When choosing a mandator he/she can look at and modify the corresponding settings.
Server-Address
Enter the entire URL to the BACKCLICK login page (GUI) into the first 'Server Address' field. Note: The last sign in the URL cannot be a '/' (Slash). In our case we enter: http://localhost/bc. The second server address specifies where your WebInterface is installed (usually both addresses are identical).HTML-Editor
You can activate or deactivate the HTML-Editor here. This affects the possibility to compose a newsletter without any HTML knowledge. When activated, it is possible to enter a text without following any specific formatting and stil get the desired result in your newsletter.
Default Format Date
You can use a place holder for the current time in your newsletters. This variable ($$APIDATE$$) can be used for different display variants. Six most common time formats are predefined, but you can define your own as well using the field “Custom Format”. The following variables are available:
Symbol | Description | Type | Example |
G | Era designator | (Text) | BC, AD |
y | Year | (Number) | 2000 |
M | Month in year | (Text & Number) | October & 10 |
d | Day in month | (Number) | 24 |
h | Hour in am/pm (1-12) | (Number) | 12 |
H | Hour in a day (0-23) | (Number) | 18 |
m | Minute in an hour | (Number) | 30 |
| s | Second in a minute | (Number) | 55 |
S | Millisecond | (Number) | 987 |
E | Day in a week | (Text) | Tuesday |
D | Day in a year | (Number) | 189 |
F | Day of week in a month | (Number) | 1 (0-based -> 1 = Tuesday) |
w | Week in a year | (Number) | 27 |
W | Week in a month | (Number) | 2 |
a | am/pm marker | (Text) | PM |
k | Hour in a day (1-24) | (Number) | 24 |
K | Hour in am/pm (0-11) | (Number) | 0 |
z | Time zone | (Text) | CEST |
' | Escape for Text | (Delimiter) | |
" | single quote | (Literal) | ' |
Examples:
Format | Result |
yyyy.MM.dd G 'at' hh:mm:ss z | 2004.09.05 AD at 03:16:51 CEST |
EEE, MMM d, ''yy | Sun, Sep 5, '04 |
h:mm a | 3:16 PM |
hh 'o'clock' a, zzzz | 03 o'clock PM, Central European Summer Time |
K:mm a, z | 3:16 PM, CEST |
yyyy.MMMM.dd GGG hh:mm aaa | 2004.September.05 AD 03:16 PM |
dd. MMMM yyyy G, HH:mm:ss 'o'clock' | 05. September 2004 AD, 15:16:51 o'clock |
 ) on the right-hand side of the entry boxnext to the input field. You will see the current date/ time in the format you chose.
Authentification
XML content may be imported by BACKCLICK, so that newsletters may be sentAuthentication
It is possible to import XML content and send newsletters from external software
. To do thiswhen using BACKCLICK. In order to do so, BACKCLICK
assimilatesprocesses XML data and executes the
neededcorresponding actions. To protect your system against unauthorized access via XML
,you
shouldcan activate the
authentificationauthentication. If
the authentificationit is activated,
every piece ofall XML data
musthave to contain login/password of a valid
password for aBACKCLICK user account.
For the XML data, the needed attributes are: “NEWSLETTERIn this case the fields "NEWSLETTER-AUTHOR-
LOGIN”LOGIN" and
“NEWSLETTER"NEWSLETTER-AUTHOR-
PASSWORD”PASSWORD" are mandatory.
Spam Check
You
maycan activate the spam-assassin here
. This willin order to check the probability
that some providers will qualify your e-mails as spam. This is an external range that will just provide someof your newsletter beeing classified as spam for some providers. This external programm provides you with hints about the content of your newsletter,
whichthat might be
interestingof interest for spam filters of some providers. If activated, you
needhave to define the server
on which the range will run.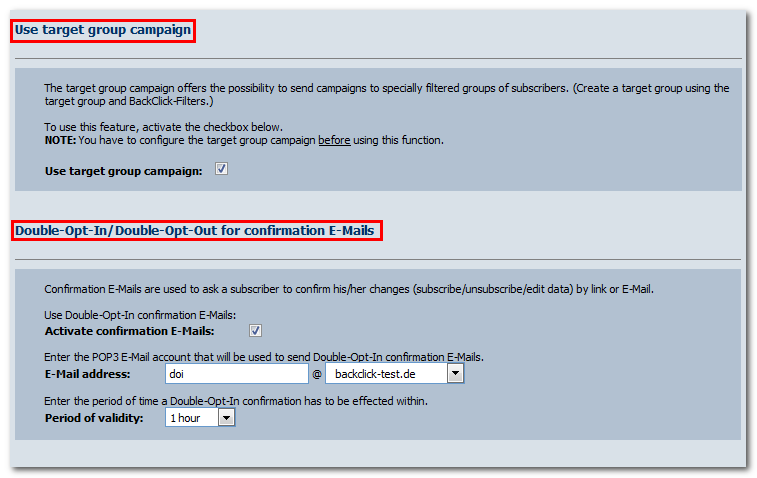
...
the programm is running on.
Use Target-Group
...
campaign
It is possible to create special target groups when using BACKCLICK with the help of filters. If you
...
want to send a newsletter to a particular group, you have to activate this function. You
...
have to configure these virtual lists
...
using "Edit Mailing list" afterwards. How to edit a mailing list is described in the following chapter “Create mailing
...
list”. After creating a mailing list the menu item “Target Group Campaign” is visible.
Confirmation E-Mail (Double-Opt-In/Double-Opt-Out)
...
Confirmation E-Mails are used to ask
...
a subscriber to confirm his information (subscription/change in profile/unsubscription) via link or
...
E-
...
Forgot password E-mail Account
...
Mail. Since some users return the E-Mail as a reply it is possible to regard this as confirmation. Create a POP3 mailbox and provide the login details for this purpose. You can define a period of time to wait for a confirmation as well. If your subscriber confirms his action after this period of time it is not valid.
Password-Forgotten E-Mail Account
This defines the E-Mail account and server to be used for sending passwords after
...
password
...
requests.
...
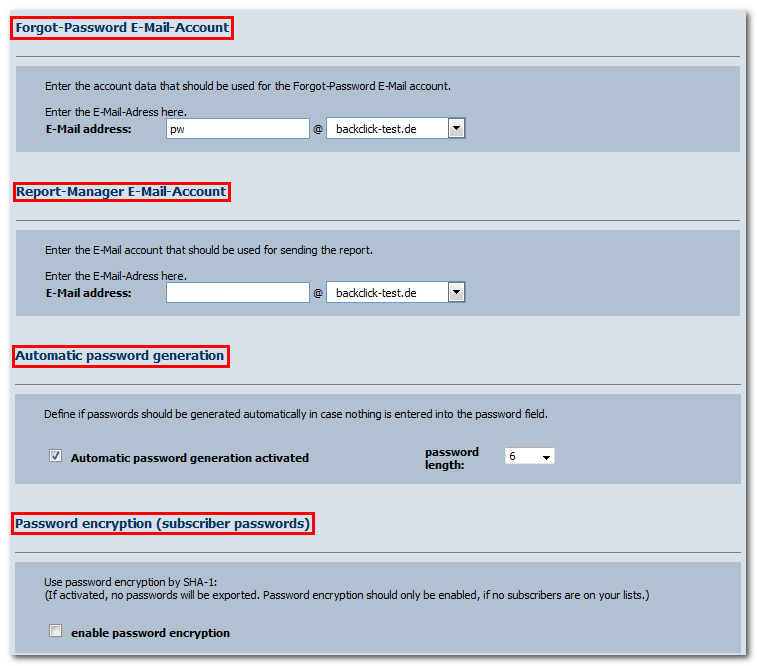
Send-Report
...
E-
...
Mail Account
...
This defines the E-Mail account and server to be used for sending reports
...
.
...
...
Generate Passwords Automatically
If you activate this function, BACKCLICK will generate
...
a password of a certain length automatically and
...
add this to the subscriber's master data. This
...
applies to subscriptions via the template based WebInterface as well as
...
to imports
...
via the
...
administrator interface. If the subscriber already exists
...
with a valid password, no
...
password will be generated.
...
Password Encryption (
...
Subscriber Password)
...
The encryption is based on the “Secure Hash
...
Algorithm”.
...
To generate
...
a checksum, the SHA-1
...
variant is used. The
...
checksum will be calculated and saved in your
...
database.
...
Due to the nature of SHA-1
...
, it is not possible to
...
retrieve the password in plain text
...
from the generated
...
checksum.
...
This way,
...
it cannot be displayed or exported. It only makes sense to use this function as long as your database is empty, meaning there are NO subscribers in it.
After all settings are done and you want to save them,
...
click the button "
...
save",
...
the button "back" takes you back to the main menu
...
without commiting any changes.