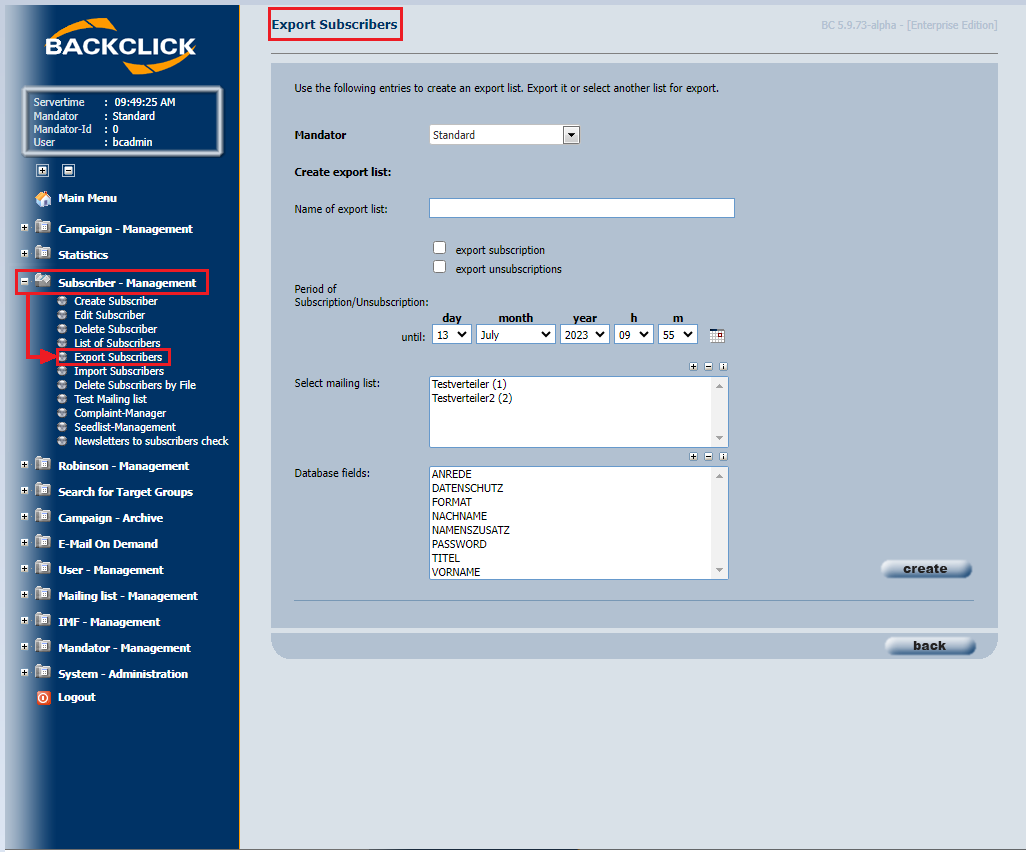
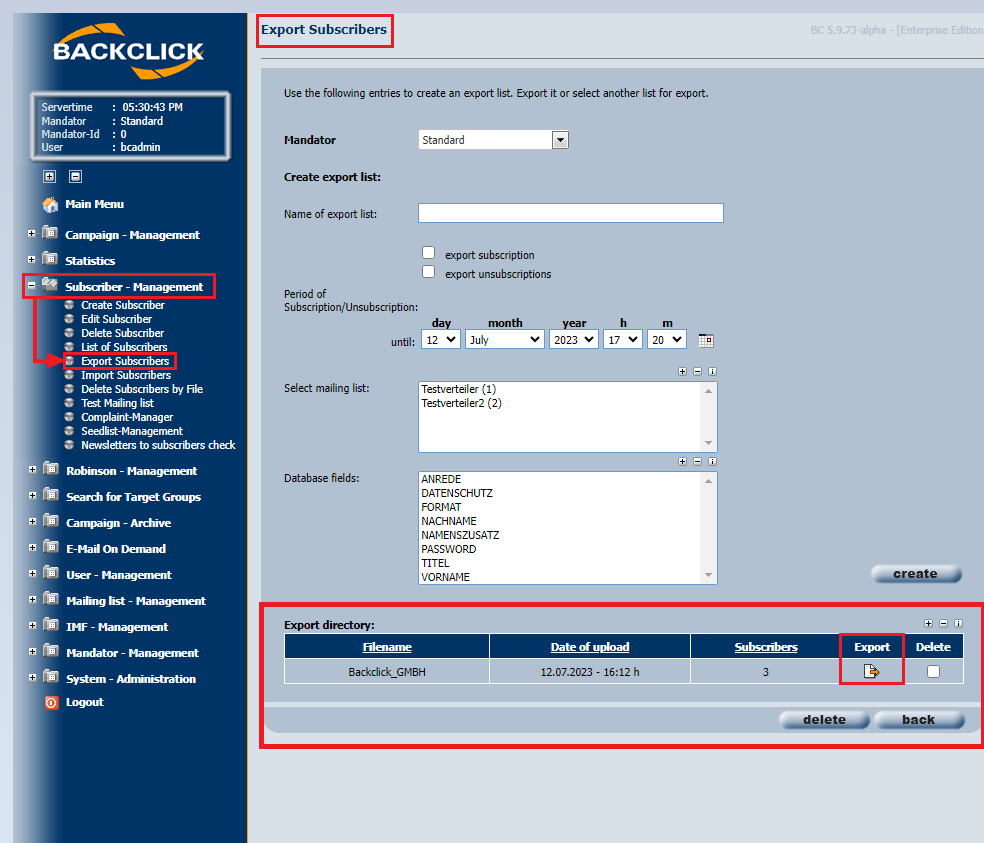
Exporting subscribers’ data
The subscribers’ data may also be routinely used away from BACKCLICK. To export the subscribers’ data, choose “Subscriber Management (Main Menu) -> export subscriber” (submenu), and all of the existing data may be exported.
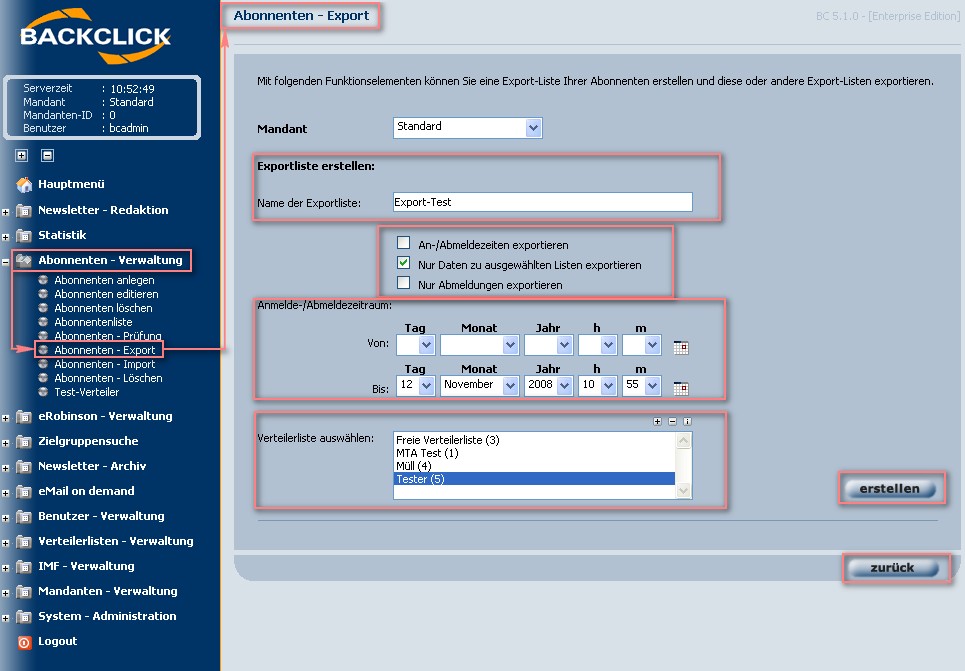
Abb. 7.5.1 - Abonnentenexport
Name of the list of exports
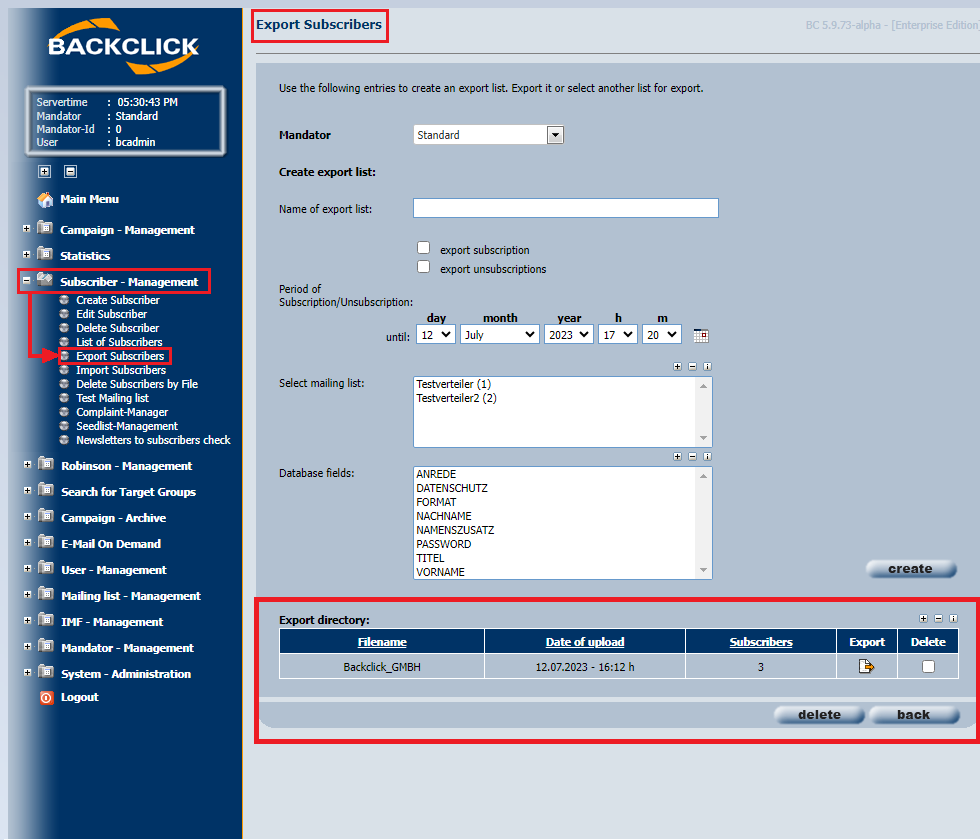
Enter a name for the Of course, you are able to use and edit data of your subscribers outside of BACKCLICK. Go to Subscriber - Management --> Export Subscribers in order to export existing subscriber data.
Name of export list
Choose a name for the export-file you want to create here. There is no need You don't have to define the file ending as “.csv,” “.txt,” etc..
Check boxes
Here you may decide which data you want to export. The subscription/ checkout data, data on mailing lists, or the checkout data only may be selected by marking the correct check box. You may also choose the subscription data as well as the checkout data of every subscriber. This is only possible after you have chosen “Subscription/ checkout data” and “checkout data”. The export file will then contain two more columns:
- SUBSCRIBED-x
- UNSUBSCRIBED-x
The “x” is a placeholder that stands for the consecutively numbered mailing list IDs. It is also possible to export only special data from the chosen lists. For example: There are subscribers in your system who are subscribed on mailing list 1 and 2, but you only want to export the information of mailing list 1. If this function is not activated, the data of mailing list 2 will also be exported because of these subscribers. The export file will then include a unix-timestamp-value.
Subscription/checkout data
If the data you want to export is about the subscription or checkout information of subscribers, you may choose time range for their subscription/checkout either manually or by using the calendars  .
.
Mailing lists
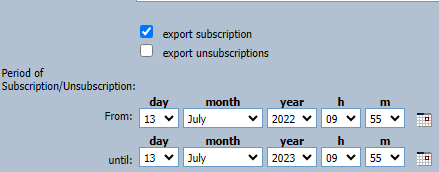
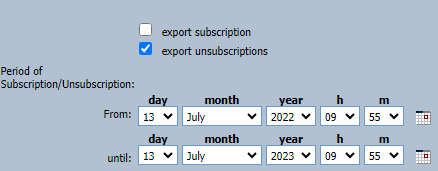
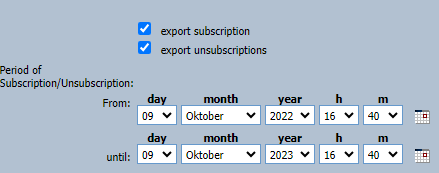
As shown in the figure, you may now This defines data to be exported. Options are: "export subscriptions" and/or "export unsubscriptions". Tick the corresponding check-box in order to receive this data.
If no check box is selected, by default all activesubscribers will be exported from the selected mailing list up to the specified unsubscribe time.
If you select exportsubscriptions, all subscriptions will be exported from the selected mailing list in the specified time period.
If you select export unsubscriptions, all unsubscriptions will be expoerted fromtheselected mailing listinthespecifiedtimeperiod.
If you select exportsubscriptionsand export unsubscriptions, all subscriptions and unsubscriptions will be expoerted from the selected mailing list in the specified time period.
Period of Subscription/Unsubscription
If data you want to export is related to the period of subscription/unsubscription you are able to define this period. You may do this manually or by using the calender provided ().
The registration timeisonlyshown,if "Exportsubscribtions" and/or "Exportunsubscriptions" hasbeenselected.
Select mailing list
This list shows all mailing lists you are permitted to access. You may choose one, more than one, or all of mailing lists in order clickwithCTRLandleftclickonthemailinglists, if you have a right to them for exporting the subscribers’ data (multiple select field).
After you have completed all the entries, click on the  -button. This will open the following view in a separate
window:
 to receive subscriber data to the corresponding list(s).
Select Database fields:
Here you can choose which subscriber data you want to export. you can choose no one, one or more then one with CTRLandleftclick.
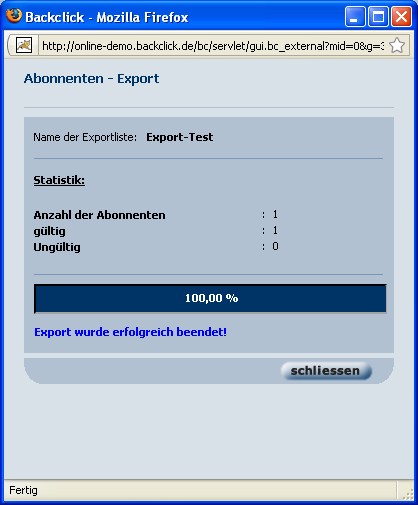
Create Export File
After you are happy with all settings, click the "create"-button. You will see the following window:
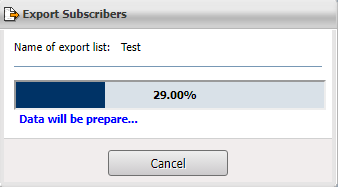
If you want to cancel an export in progress. Please click on the “Cancel” button.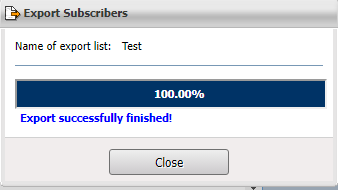
As shown in the figure, the progress of the your export will be is shown during creation of the export file. Please click on the  "close"-button for the first time AFTER the only AFTER your file has been created.
The exportable file , ready for exporting, will then be listed under "Export directory".
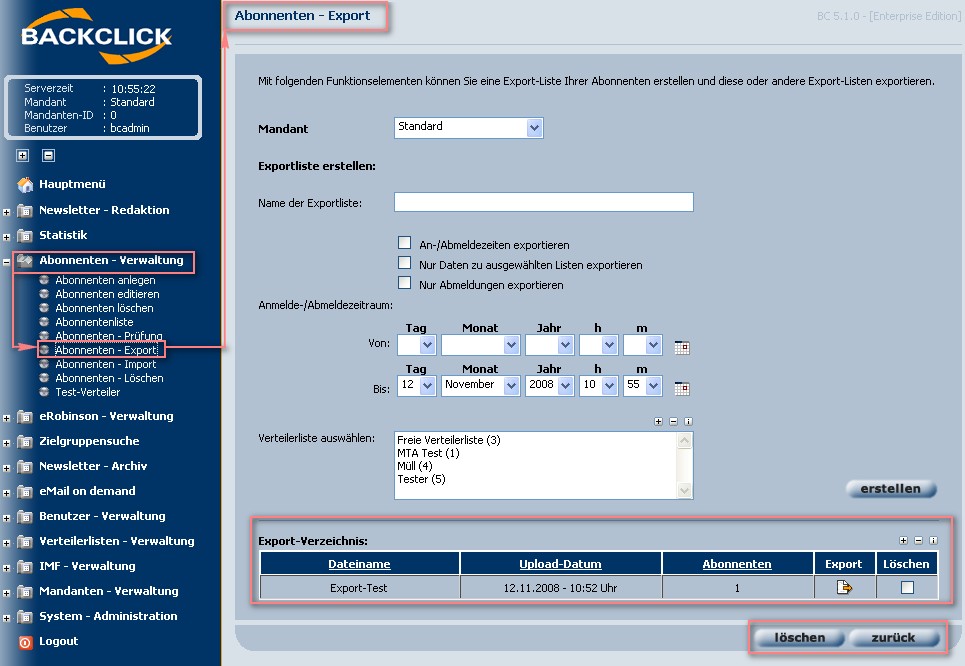
Export-directory
This file will remain ready for exporting as long as it is saved in the system database. be available for export until you delete it.
The export files can be sorted based on name, upload date and number of subscribers.
Subscribers
The number in the Subscribers column is the number of unique subscribers and may differ from the number of lines in the export file.Export File
As explained later on in this manualdocumentation, there may be other files , in addition to the your subscriber export files, that contain the results of the profile filter lists (target group list). These also may be saved on your local system. To export one of those files, click on the -symbol right behind the name of the file. This will open the following view:
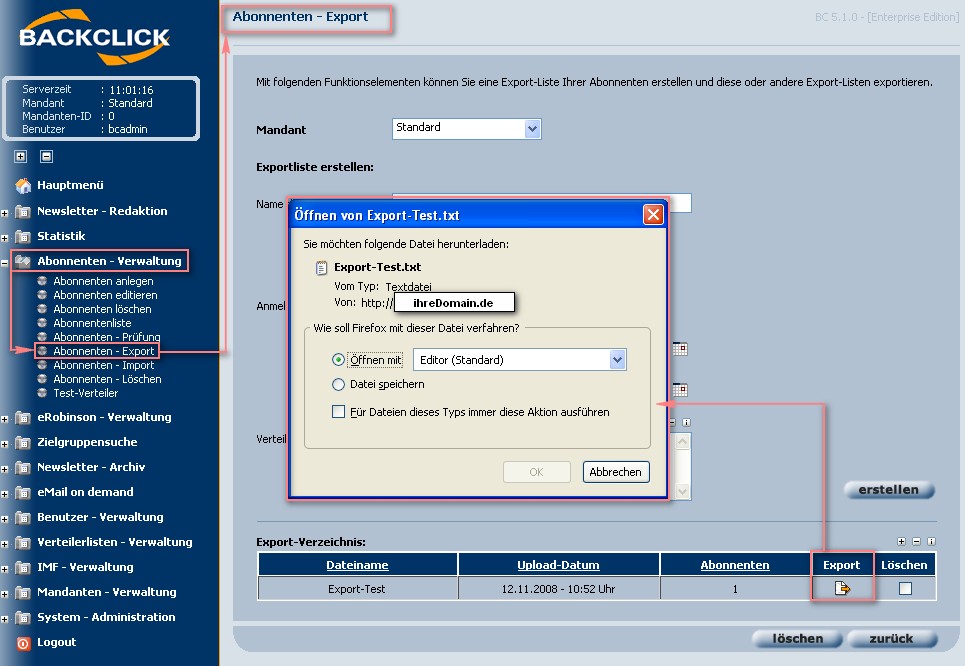
Abb. 7.5.3 - Abonnentenexport
A file download dialogue will be initiated. This will ask you to either open or save the file in your local system. To save the file, mark the check box that says “Save File,” and the file will automatically receive the ending “.txt”. If you would like the function to be processed whenever the file dialogue is opened, mark the check box that says, “For files of this type, always process this action.” Whenever a text file like this is exported, this action will be processed. . Results of your target-group filter-exports are available for download as well. In order to export a file, click the -button next to the file you want to export.
File
The file will be opened in an editor (per default value). The content of the Export-Test.txt file (in our example here) will then look looks like this:


All the fields are separated by tabs, which allows with tabulators, allowing you to use this file again for import importing purposes into BACKCLICK again.
Delete File
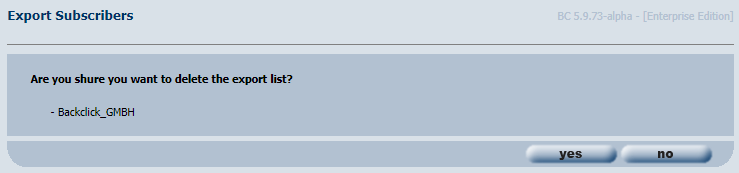
To erase one of the export files, you must mark the check box right behind the name of the export file and click on the  "Yes"-button.
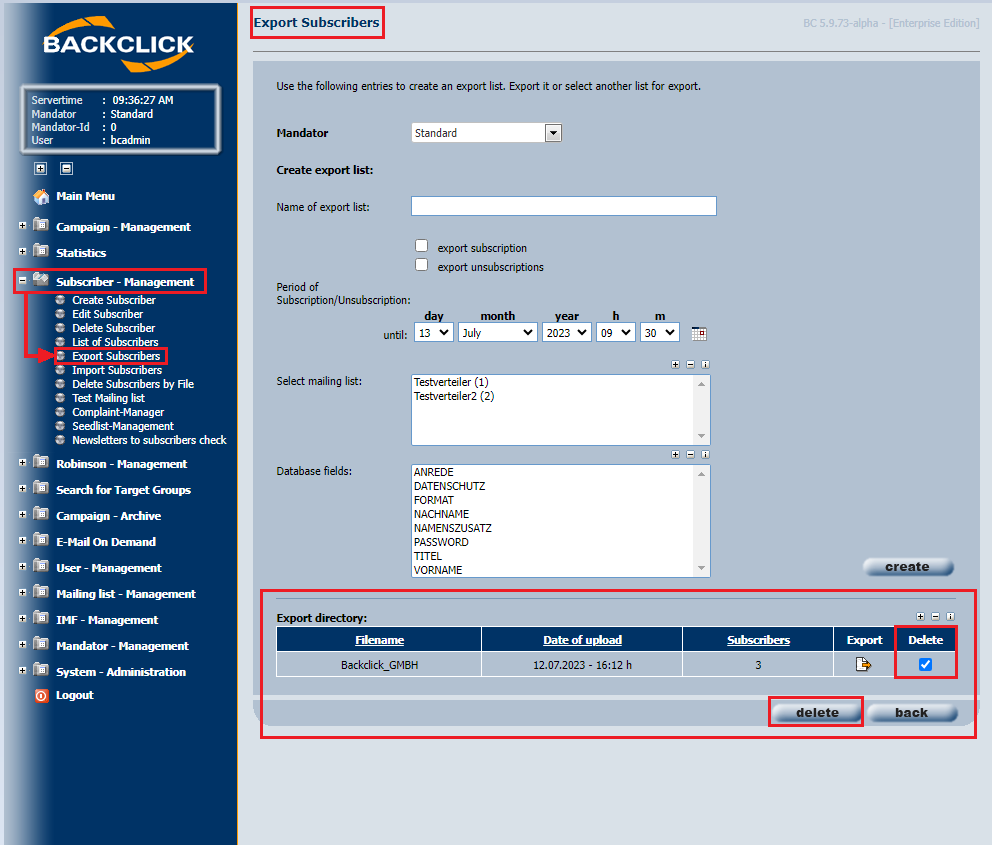
This will open another window displaying a safety question, which you will need to confirm by clicking on “yes” if you really want to erase the file. After this, the file will be removed from the list.
PLEASE NOTE: Only the export file (the result of the export) will be removed, but not the subscribers.
If you decide not to erase the file from your list when you see the window with the safety question, click on  "No". This will return you to the submenu “export subscribers”.