Create a mailing list
The structure of BACKCLICK assumes that every subscriber needs to be a member of at least one mailing list. BACKCLICK users will be able to send a newsletter or a direct-marketing campaign to every subscriber on these special mailing lists. Subscribers may sign up/unsubscribe for a newsletter or change their profile as soon as one mailing list has been created. BACKCLICK users cannot create or import subscribers until one mailing list has been created.
To see whether your administrator has already created the required lists, go to the menu for Newsletter - Redaktion -> Newsletter schreiben The lists are available as soon as they appear on the menu.
If your administrator has already created the required lists, there is no longer a need to start a new mailing list. In that case, you can go on to chapter Anlegen der ersten Abonnenten
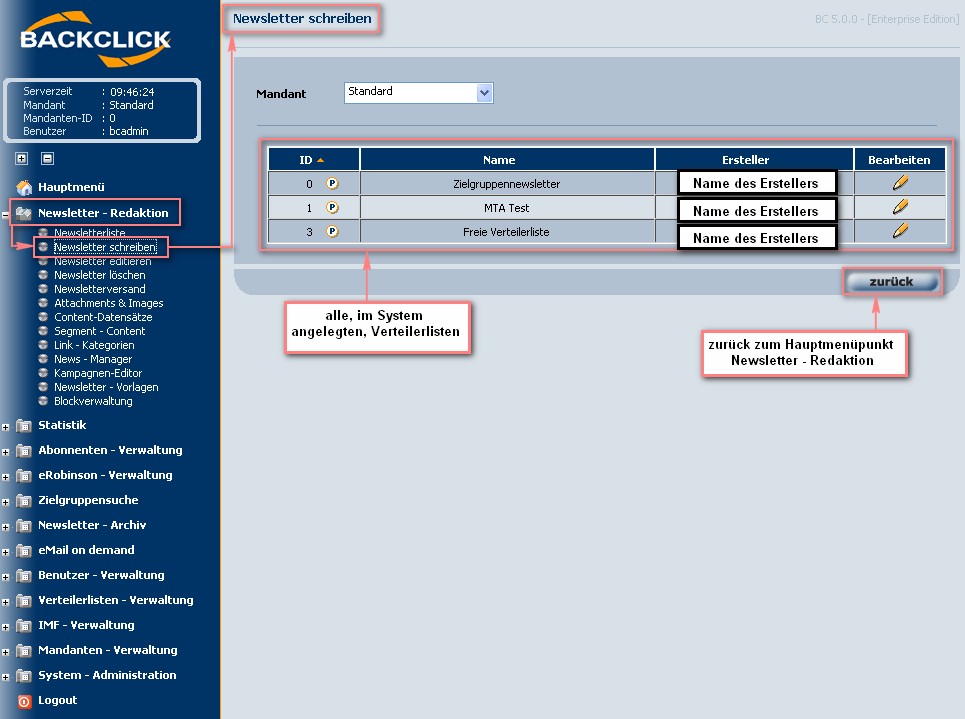
Abb. 3.2 - Newsletter schreiben (Beispiel mit bereits angegelegten Verteilerlisten)
If you do not see a mailing list here you must create one now. Choose the menu item Verteilerlistenverwaltung -> Verteilerliste anlegen.
The first mailing list you create will get ID 1. The second mailing list will get ID2, and so on. Those IDs will be important when you want import data. You will also need them for subscribing to and unsubscribing from HTML templates.
Choose the menu item Verteilerliste anlegen to open the following view:
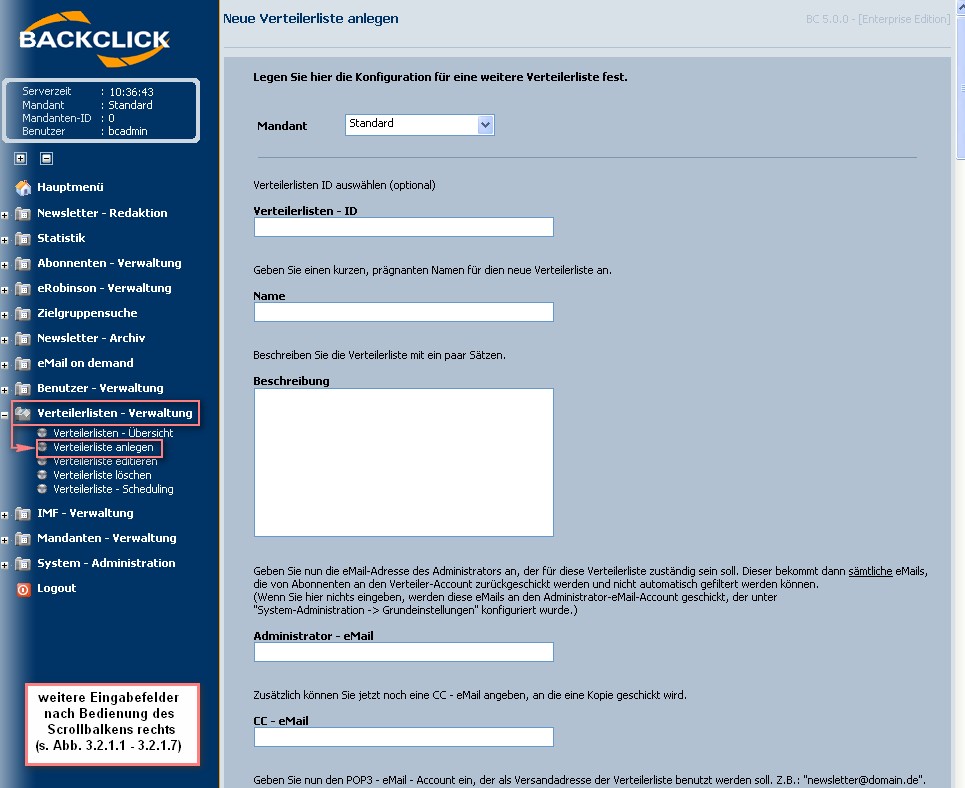
Figure 3.2.1 — Create mailing list (without entries)
Before you get started, you will need to have the following information:
- E-mail address that will be shown as the sending e-mail address.
- Alternate name that will be shown as the sender name in the e-mail client of the subscriber.
- Email-Adresse des Administrators, der die nicht automatisch erkannten Rückläufer-Emails zur Bearbeitung erhält
- OPTIONAL: E-mail address of the assistant administrator who will get any other returned e-mails that BACKCLICK could not sort.
- POP3 access information for the account of the sender's e-mail address (user name, password, host, port)
- SMTP server that is in charge of sending the e-mails (host, port, optional user, password)
All these entries are described in more detail below.

Figure 3.2.1.1 — Create mailing list (Example entries, Part 1)
Mailing list ID
You have the option of numbering the mailing list yourself, if you need to do this to sort the mailing list in another order. If this field is left blank, BACKCLICK will automatically generate sequenced IDs for all mailing lists that are created. The ID is based on the time when the mailing list is saved in BACKCLICK.
Name
You may name your mailing list here. This name is shown in the administrative interface in BACKCLICK. You can change it if you wish to do so.
Description (optional)
You may enter a short description of your mailing list here. It will only be shown if you are editing this list.
Administrator's - e-mail
The e-mail address of the administrator of this mailing list is to be entered here. This administrator will always receive the e-mails that BACKCLICK could not sort correctly.
CC - e-mail (optional)
You may define an additional e-mail address that will also receive any e-mails that BACKCLICK could not sort.
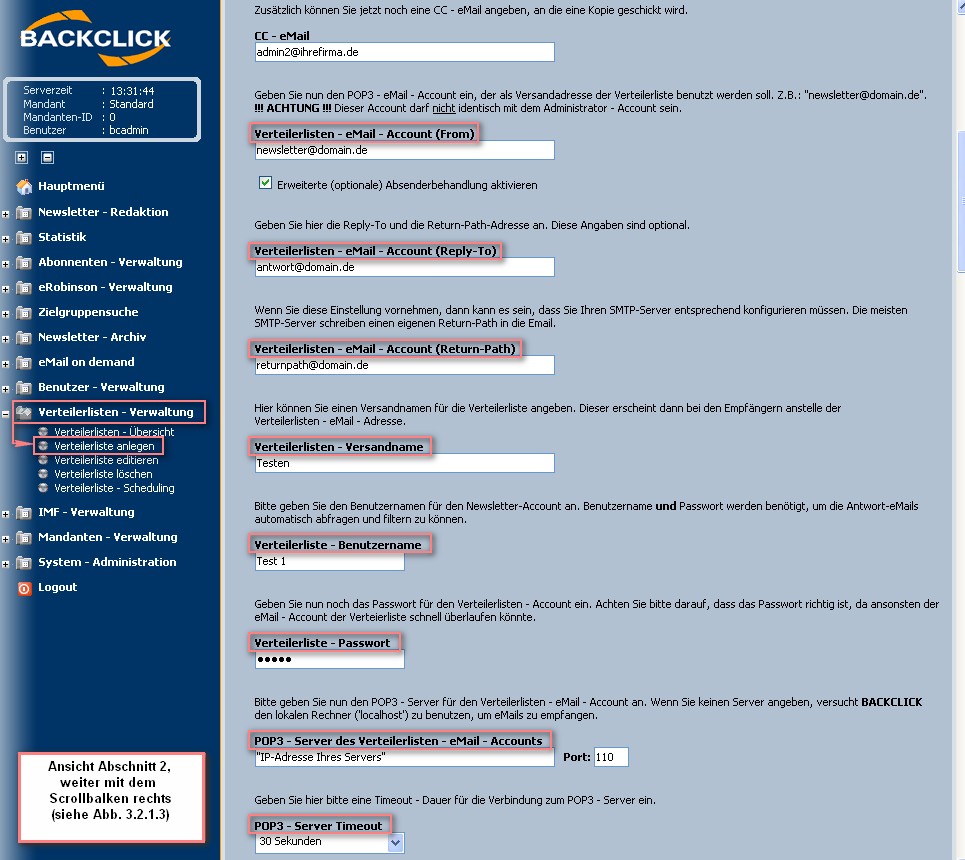
Figure 3.2.1.2 — Create mailing list (Example entries, Part 2)
Mailing list e-mail account (From)
Here you must define the e-mail address to be used for sending the newsletter that goes to this mailing list. For example: "newsletter@domain.de". This e-mail address is shown as the sender's e-mail address, at the subscriber's e-mail client. PLEASE NOTE: This account cannot be the same account as the administrator's account.
Activate advanced sender options
If the advanced-sender options are activated, you can define additional mailing-list e-mail account addresses for Reply To and Return Path.
- Reply-To is the e-mail address that receives answering e-mails. Every answer the subscriber sends to BACKCLICK by clicking the answer button goes to this e-mail address.
- Return-Pathis the e-mail address that receives returned e-mails if the subscriber's e-mail address is unavailable or unknown. Your SMTP server will generate these e-mail accounts automatically. Please check to see if this e-mail account is similar to the one in your SMTP server.
Address of dispatch
An alternate name of this mailing list can be entered here. This name will be displayed in the subscriber's e-mail client instead of the sender's e-mail address (the mailing list e-mail account).
Mailing list user name
You have to must choose a user name for the POP3 e-mail newsletter account of the sender's e-mail address. User name and user password are important for the automatic filter, and for the request function for the “Reply To” e-mails.
Password for mailing list
You must choose a password to go with the chosen user name (for the POP3 account).
POP3-server for the e-mail account of the mailing list
Please enter the serverhost for your POP3 newsletter account of the sender's e-mail address here. If you do not define a serverhost here, BACKCLICK will try to build up an access to your “localhost” for receiving e-mails.
POP3-server timeout
Please define a timeout period for the access to your POP3 server here. If this server has a problem while checking the e-mails, BACKCLICK will stop processing the access. The timeout period can be anywhere from 1 to 30 seconds.
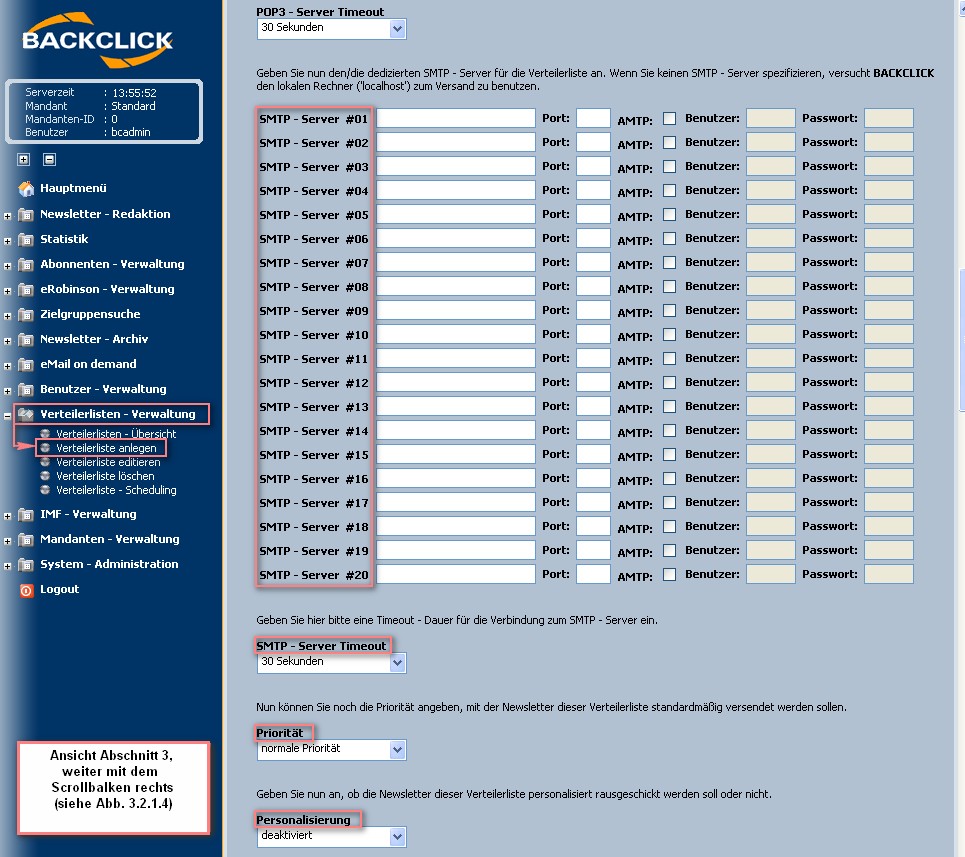
Abb. 3.2.1.3 - Verteilerliste anlegen (Beispieleingaben, Abschnitt 3)
SMTP server #01–#20
Here you must enter one (or more) dedicated SMTP servers for this mailing list. If you do not specify the server, BACKCLICK will try to access your “localhost” for sending the newsletter. Enter the additional access information for the SMTP server here, if needed. BACKCLICK supports AMTP, which is used by web.de and others.
SMTP - Server Timeout
Please define a timeout period for the access to your SMTP server here. If this server has a problem while checking the e-mails, BACKCLICK will stop processing the access. The timeout period can be anywhere from1 to 30 seconds.
PLEASE NOTE: While you are using the internal MTA, you will not see menu items:
- SMTP - Server #01 - #20 und
- SMTP - Server Timeout
because they will not find any connection.
For further information, please read Chapter
BACKCLICK MTA
Priority
You may define the priority of sending your newsletter with this mailing list. This will not affect the rate of sending, but the view in the subscriber's mail client.
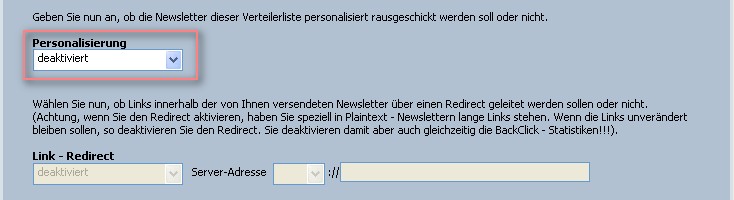
Personalization
If you activate “Personalization” here, every subscriber will receive his or her personalized newsletter. This is filled with personal data from the BACKCLICK database. You may choose from variables and replacement characters that include $$TITLE$$, $$LASTNAME$$, and others. You can also add replacement characters to (for example) $$SIZEOFSHOE$$. The rate of sending a personalized newsletter is between 100,000 and 1,500,000 e-mails per hour. This rate depends on your hardware, connections, number of SMTP servers, and the size of the newsletter.
Link - Redirect
This function makes it possible to report your responses. When you activate this function, hyperlinks will be automatically replaced by BACKCLICK over the server where BACKCLICK is installed, and recorded in the BACKCLICK statistical database. Without this activation, it is not possible to check the response data. (If your links should not be changed in any way, please deactivate Link-Redirect.) PLEASE NOTE: BACKCLICK statistics will also be deactivated when you do this.
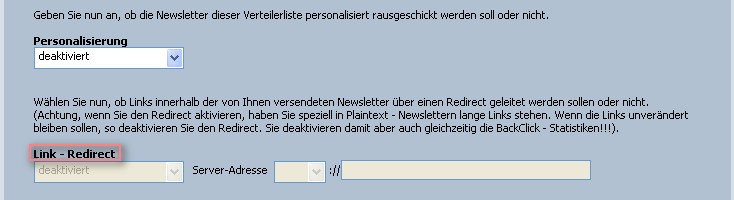
If the “Personalization” is deactivated, link redirect “Link-Redirect” and “Mailto Redirect” are grey-highlighted, and are NOT usable/displaceable.

Figure 3.2.1.4 — Create mailing list (Example entries, Part 4)
Individualization
Here you may define whether every subscriber should get an individualized newsletter. If you activate this function, the content will be calculated by defined logics. PLEASE NOTE: Do not activate this function if you do not intend to use it, because the computing time while sending a newsletter will be much higher. You will only reach sending rates between 50,000 and 100,000 newsletters per hour.
Inline Images
By activating this function, you will be able to send off-line HTML e-mails. For example, if you put http://www.domain.de/images/image.jpg in your newsletter source code (HTML), BACKCLICK will automatically download this picture from the World Wide Web and embed it in your newsletter. The advantage here is that even the newer e-mail clients like AOL 9.0 or OUTLOOK 2003 will display the e-mails in the right format, automatically, without the help of the subscriber. You may use picture formats like .gif or .jpg. Please consider that your newsletter will be much bigger with an inline image than without one. You may deactivate this function individually for each newsletter you would like to send, even if you had previously activated the “Inline Images” function.
if you had previously activated the “Inline Images” function.
Default format/custom format
You may choose among the following default formats:
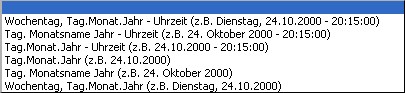
If you do not find the format you need, please define a new one by clicking on (Custom Format). If you use another format than the one chosen in the system settings, here is what they will look like.
Activate IVW evaluation
To get an IVW-conformable count of the opened HTML newsletters, you must activate this function. You will need an SZM link, which you will get from IVW. IVW charges a fee for this service. Please read the instructions on the IVW external website.
Activate BACKCLICK's internal evaluation
BACKCLICK offers a similar version of the IVW evaluation, but free of charge. You must activate this function in order to use it. Please note that evaluation is only possible for HTML newsletters. The percentile evaluation is also affected by auto preview, HTML proxy server, and deactivation of downloading the same content again.
Activate response tracking and personalized analysis for market research
BACKCLICK makes it possible for you to relate your response data to the profile data of your subscribers. That way, you can analyze the response data as it relates to individual subscribers. This data may then be exported. PLEASE NOTE: Every nation has its own data-protection laws. You may have liability if your data and its use do not conform to these law.
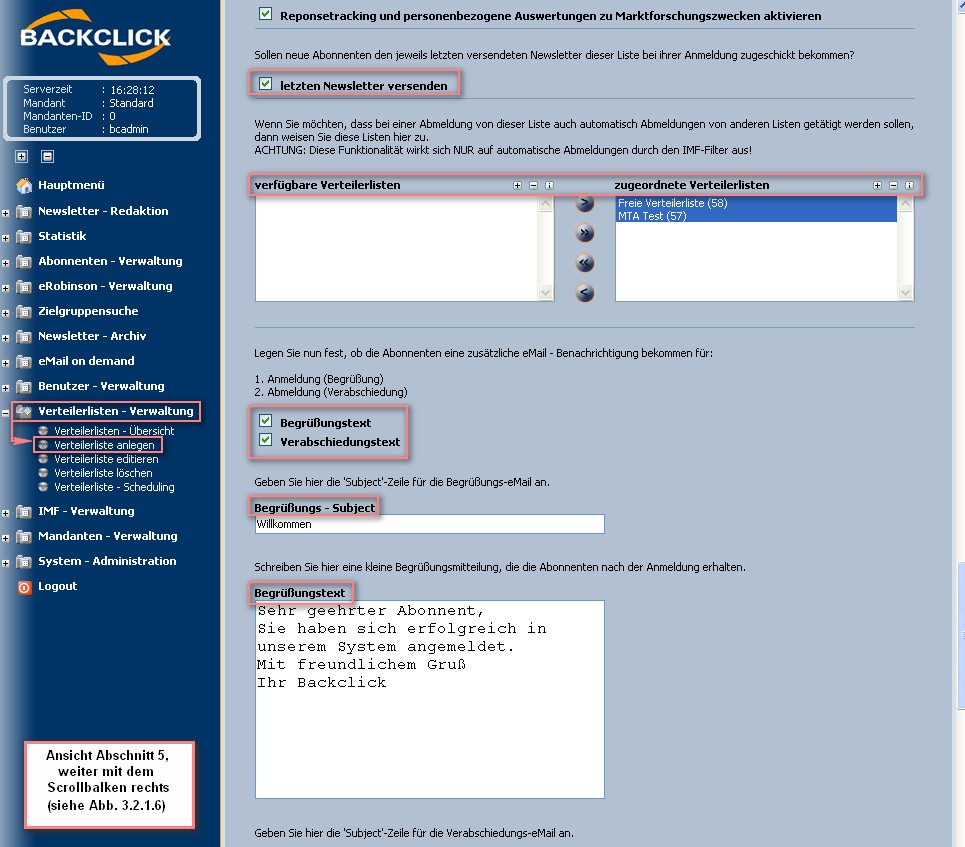
Abb. 3.2.1.5 - Verteilerliste anlegen (Beispieleingaben, Abschnitt 5)
Send last newsletter
If a subscriber applies over the WebInterface, he or she will automatically receive the last newsletter sent by BACKCLICK. This will only happen if the function is activated.
Mailing lists
Please activate this function if a subscriber no longer wants to receive a special newsletter from an allocated mailing list and/or if you want the individual unsubscribed from other lists as well.
PLEASE NOTE: This is ONLY valid for unsubscribing over your IMF filter!
Welcome message/Goodbye message
If you activate this function, two messages will be sent to your subscribers. Those who subscribed will receive a “Welcome” message (“confirmed-opt-in”). Those who unsubscribed will receive a “Goodbye” message (“confirmed-opt-out”). PLEASE NOTE: If you already use the double-opt in/out function, you do not have to activate this function.
Welcome-subject
This message will be shown in the subject line of the welcome e-mail that BACKCLICK will send.
Welcome message
Write a short welcome message here. The subscriber will receive this message in plain text after subscribing.

Abb. 3.2.1.6 - Verteilerliste anlegen (Beispieleingaben, Abschnitt 6)
Goodbye message
Write a short notification text here. The subscriber will receive this after unsubscribing from the mailing list.
Subject
Write the message of your standard newsletter here. It will be shown in every newsletter you write as the subject line (default subject). A current subject may be substituted in every newsletter for the standard one.
Subject of test campaign
Please enter a subject line for your test campaign. This subject line will appear in each test campaign that a subscriber requests over the WebInterface.
E-mail on demand
Diese Funktion ermöglicht es Ihnen bei Rückläufern, die vom System nicht automatisch erkannt werden, eine Antwort Email an den Absender der Rücklauf Email zu versenden. Um diese Antwort Email zu verfassen, lesen Sie bitte Kapitel Email_on_demand ( siehe Seite 403).
Template
The template “Autoremove” gives subscribers the option of unsubscribing easily from your newsletter. You will find some of these templates when BACKCLICK is delivered, and you may edit them as you like. In addition, you will be able to create your own template for unsubscribing. Please read chapter WebInterface - Templates for more information. You will find all the existing templates in this “Select” box.
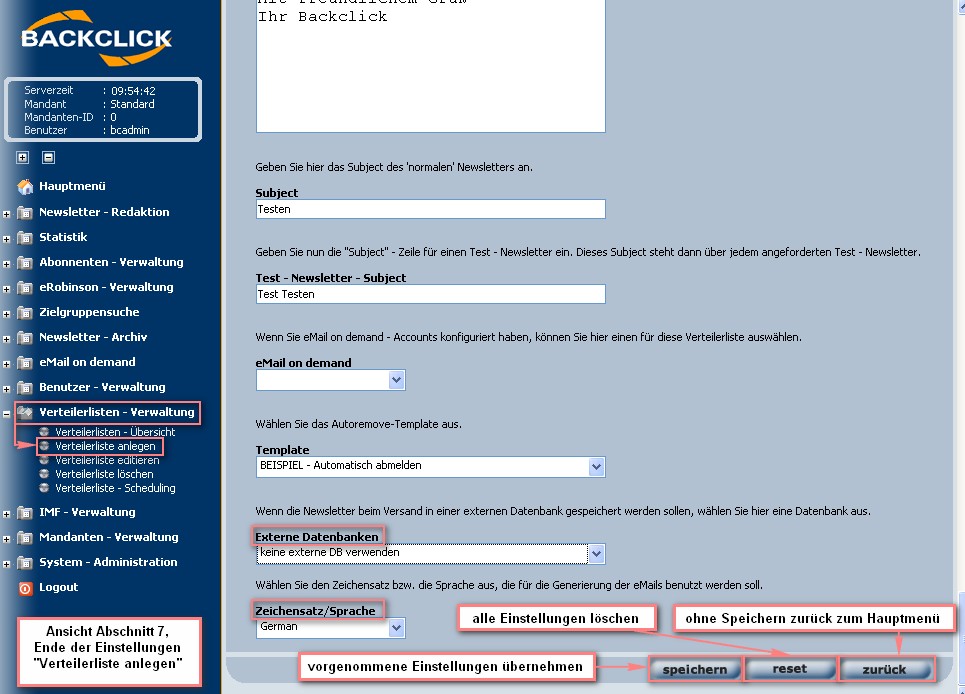
Abb. 3.2.1.7 - Verteilerliste anlegen (Beispieleingaben, Abschnitt 7)
External databases
If an external database is configured, you may choose it out of this “Select” box. Any newsletters sent with this mailing list will be stored there. Please read chapter XX, “System Settings -> External Databases,” for more information.
Charset/Language
This is where you must choose the charset/language in which you want to create you newsletter, so that the characters are displayed correctly.
If all settings are complete and you want to save them, please click the button . If all your entries are correct, and the server is available, you will see the following confirmation:
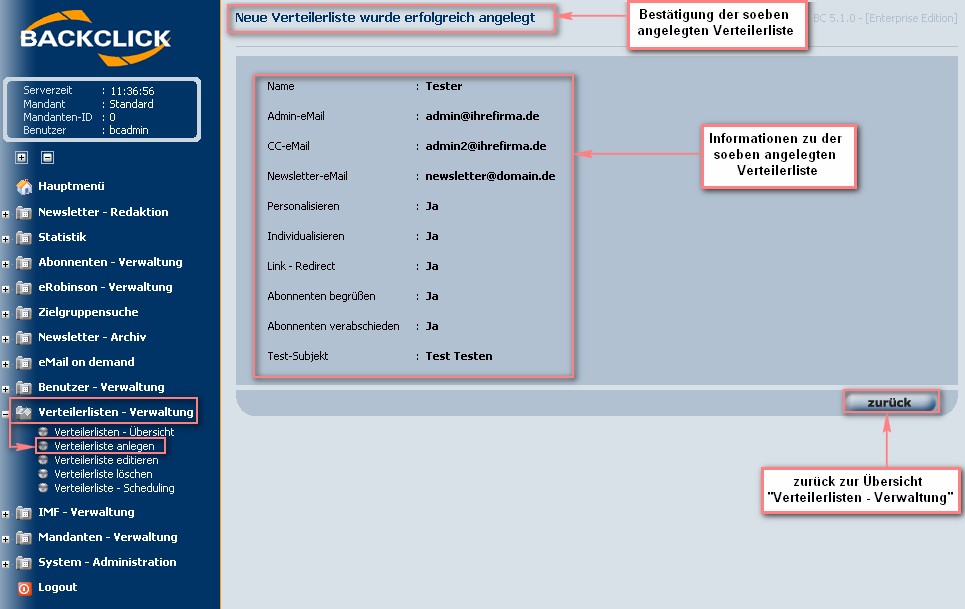
Abb. 3.2.2 - Verteilerliste angelegt (Beispieleingaben)
If an error message is shown here, please follow the instructions to correct the issue. If all settings are correct, you may now create the first subscriber in your system, and connect the subscriber to this mailing list.