Now that you have followed the preliminary steps necessary, you are ready to create your first newsletter.
You finished the basic settings, (at least) one mailing list is available and you created yourself as subscriber.
Switch to the menu Campaign - Management -> Create new Campaign. You will see an overview of the mailing lists you are allowed to access. If you do not see a mailing list, you either do not have the privilege necessary or there is no mailing list in your system. Please contact your system administrator in this case.
The following overview will be displayed:
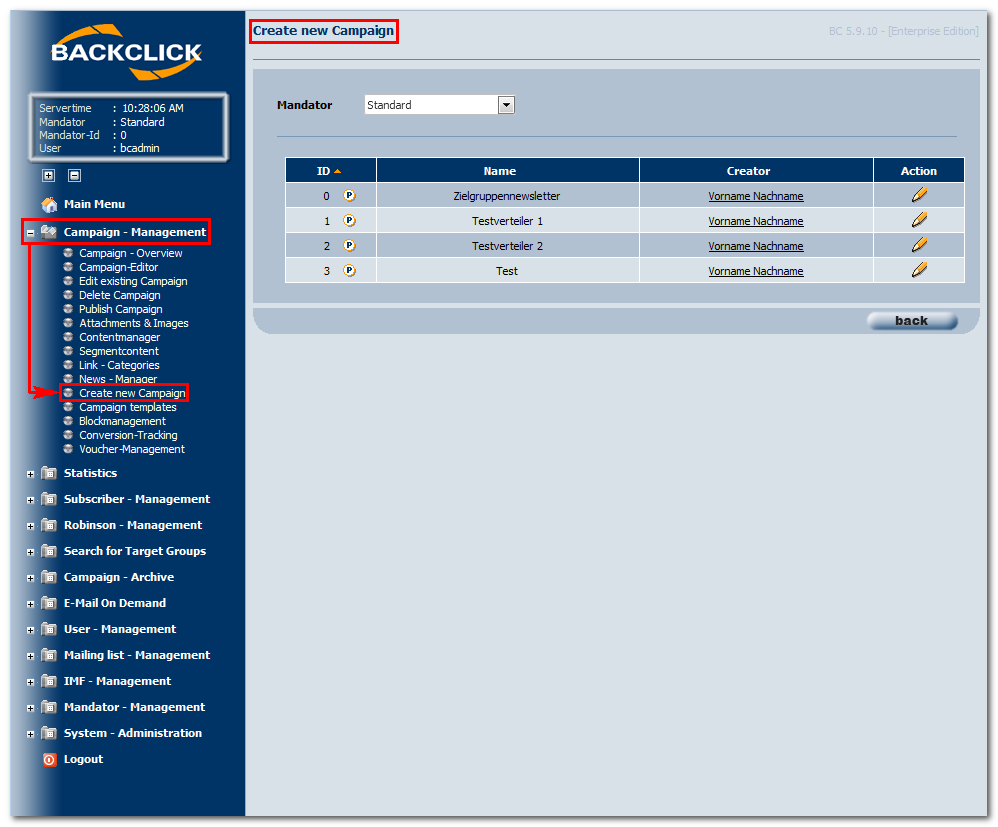
Fig. 3.6 - Create a newsletter (1)
Choose the mailing you want to send a newsletter to. Click the "Edit"-Symbol at the end of the line. The entry mask for your content will open:
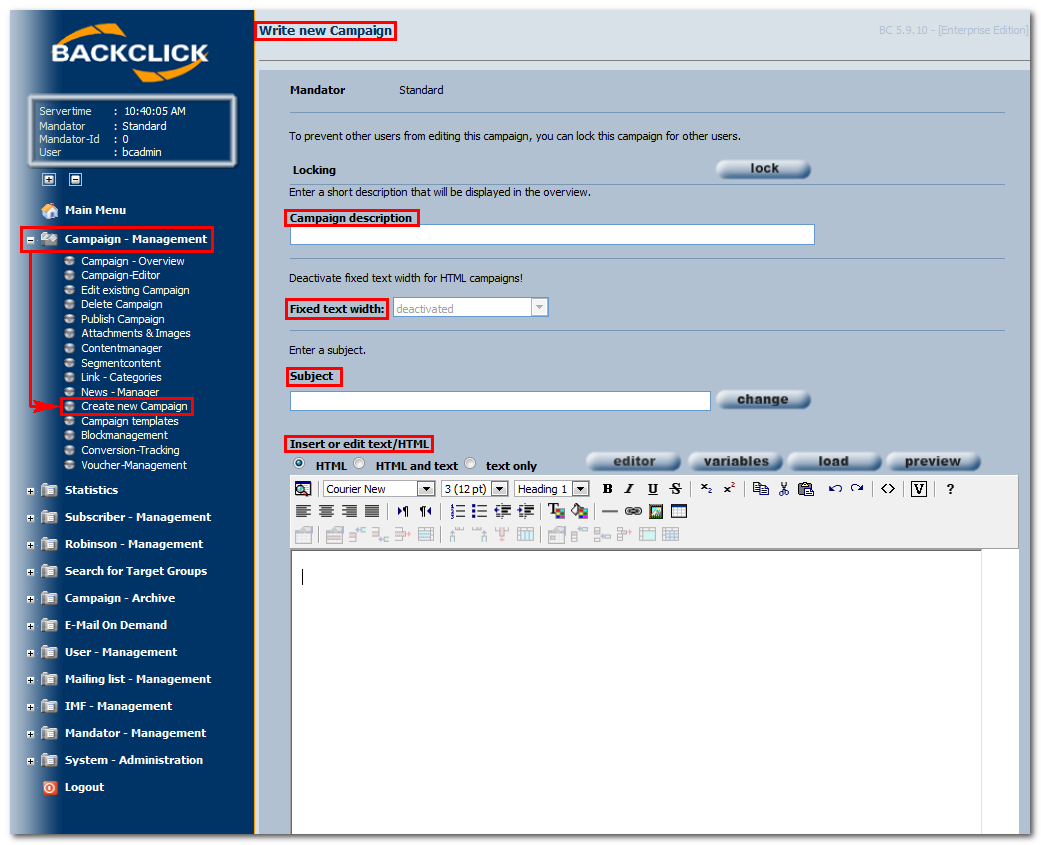
Fig. 3.6.1 - Create a newsletter (Example input)
Campaign description
Please enter a short description for your newsletter. It will be used to display the newsletter in the administrator interface. If you want to create more than one newsletter for this mailing list in advance, you are able to differentiate between the newsletters with the help of this description.
Fixed text width
You can define the maximum line width for text newsletters here (relevant for 'text-only' only). The newsletter will be reformatted according to your definitions.
Subject
Enter the subject of your newsletter here. All placeholders/variables you defined in your database designer can be used.
Insert or edit text/HTML
Choice of newsletter type: Before create a newsletter, you have to decide whether you want to send it as text or HTML.
It is possible to send both formats to your subscriber at the same time. This kind of E-Mail is called “Multipart”.
Possible choices are:
- HTML
- HTML and text (Multipart)
- text only
In our example we create an HTML newsletter. After choosing this type you will see an HTML editor as a possibility for input.
You can create your newsletter using this editor, we will explain it's features later on. It is possible to drag and drop HTML newsletters from Outlook and Outlook Express into this editor and edit these.
Choose template
When creating newsletters you can choose between different templates as well. You can create or edit these templates yourself. All these templates are managed in “Campaign Management -> Campaign Templates” menu selection. To edit a particular template, click the  in the HTML editor. This will open a separate window, which will show you all the templates that you may work on.
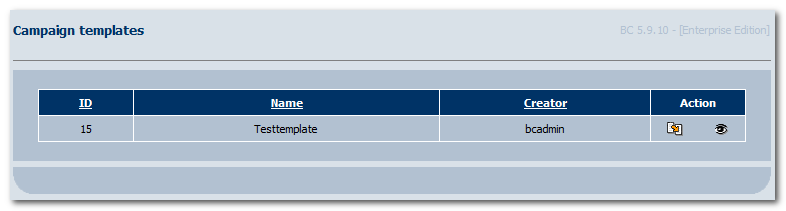
You will see a preview if you click on the ( ). You can open the template directly by clicking on the -Button. This will open the template in your HTML editor; it may then be used for the newsletter.
Personalization and Variables
As seen in the pictures below placeholders for purposes of personalization are available. Every variable you defined in your database designer may be used here. Clicking on "variables" will open the following select-box:
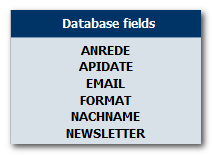
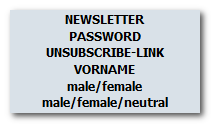
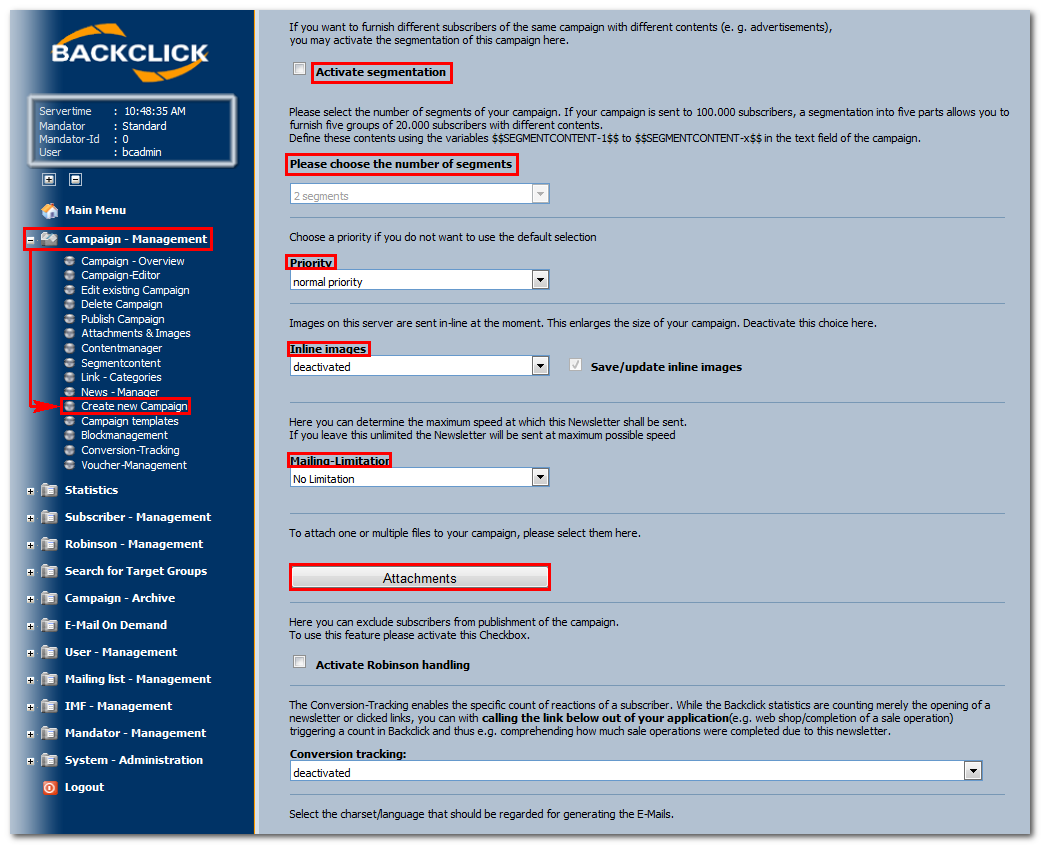
Fig. 3.6.2 - Create a newsletter (Example input)
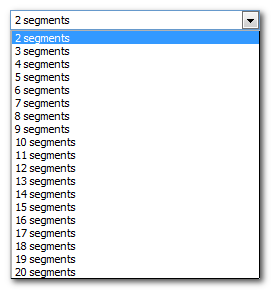
Segmentation / Number of segments
It is possible to send different content to different recipients. In order to do so replace parts of your newsletter by $$SEGMENTCONTENT-1$$. According to prior programming, content of these segments define content for parts of your subscribers. The number of segments is not limited by BACKCLICK. The entry mask can be found under Campaign-Management -> Segment Content.

Fig. 3.6.2.1 - Define Segment Content
You have to choose the number of segments for your newsletter as well. For example: You want to send a newsletter to 100,000 subscribers and select “5” segments in your settings. BACKCLICK will now divide your subscribers into five blocks, with 20,000 subscribers per block. You may now define a different content for each block. The following segments are available:
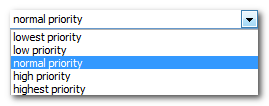
Priority
You may choose the priority of your newsletter, which will be shown in the e-mail client of your subscriber. The following options are available:
Inline-Images
When composing an HTML newsletter you may use this feature to send pictures within the newsletter code itself. Advantages are that pictures are available offline and archiving newsletters is possible as well. On the other hand, disadvantages are that the volume of your newsletter increases massively, meaning retrieving and loading it will take more time. Also, high-security email servers might reject mails like this. Due to this, you should only activate this feature if you are able to retrace and exclude the disadvantages.
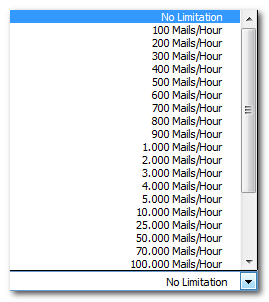
Speed limit
You may limit speed of sending your newsletters. This will reduce the number of newsletters that BACKCLICK will send per hour until sending to all subscribers chosen is done. If you do not reduce the number of newsletters sent per hour, BACKCLICK will try to use the maximum rate, depending on your contract, in order to send. The following options are available:
Attachments
You may add as many attachments to your newsletter as you like. Mark the desired attachment listed in the box that says “Available attachments”, and click on the  -Button. The chosen attachments are now shown in the box on the right, labeled “Attachments”. If there are no selectable attachments in the box, you may complete the settings for this newsletter, and provide BACKCLICK with the necessary data afterwards (see “Attachments & Images”).

Abb. 3.6.3 - Newsletter schreiben (Beispieleingaben)
Activate eRobinson-handling
You may activate this function to exclude particular subscribers from a newsletter mailing. Possible reasons to exclude these subscribers may be:
- E-mail addresses from an external database
- E-mail addresses that do not fit into target groups because of special criteria
- E-mail addresses that responded to special selections
- E-mail addresses of another mailing list in BACKCLICK
Activating this function will open eight selection boxes. To exclude the subscribers, select the entries in the left box, and confirm them by clicking on the -Button(now shown in the right box).
Abb. 3.6.4 - Newsletter schreiben (Beispieleingaben)
Charset/Language
You will need to select the charset/language that should be used to correctly display the letters of the newsletter in the e-mail client of the subscriber.
Status
After you have added all the information and content to your newsletter, you may choose between two workflow statuses. If the status is set on “Draft,” no one can initiate sending the newsletter. If the status is set on “Ready for publishing,” you will find this newsletter in the “Campaign Overview”
Anyone who is authorized to access this newsletter may start sending it immediately, or define a date when it is to be sent. When all the necessary settings are complete, you may click on "save" to save your settings and contents. The newsletter will then be shown in either “Edit Existing Campaign” or “Publish Campaign.”