Management of blocks
Before you create your newsletter campaign, you will need to define or create the blocks that you will use to build the templates. To create a block, click on the menu item “Newsletter editorial staff > block management”:
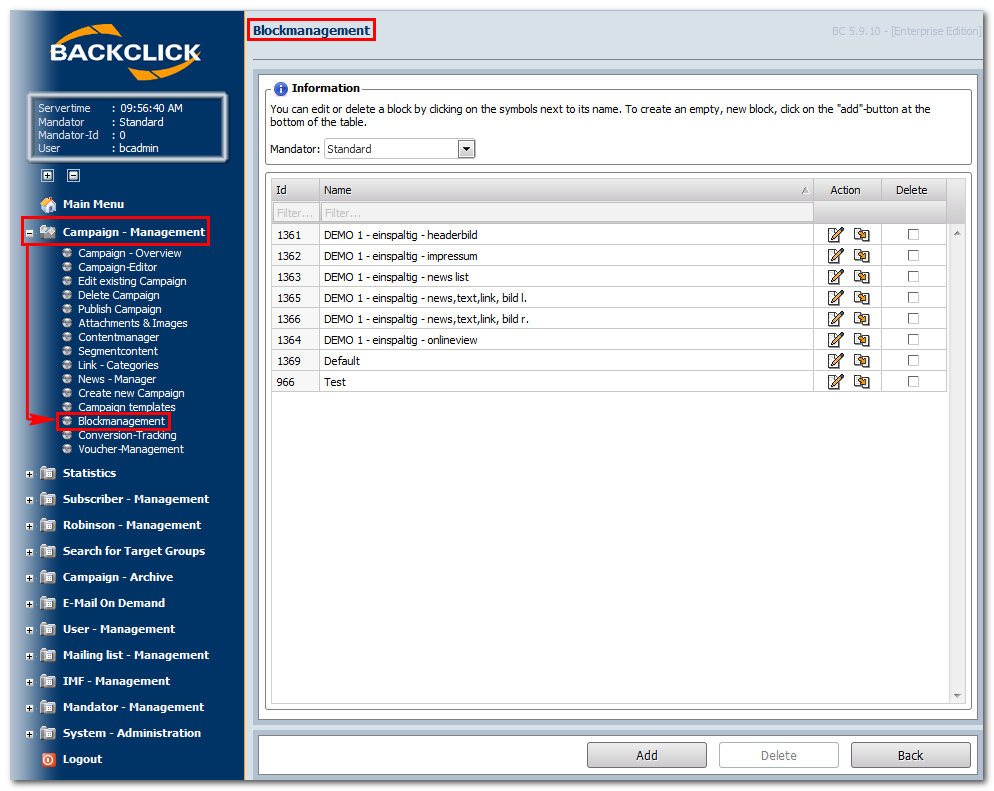
Abb. 11.6.2 - Blockverwaltung (Beispielblöcke; nicht enthalten im Auslieferungszustand)
To open the editor that configures the blocks, click on: "Edit":
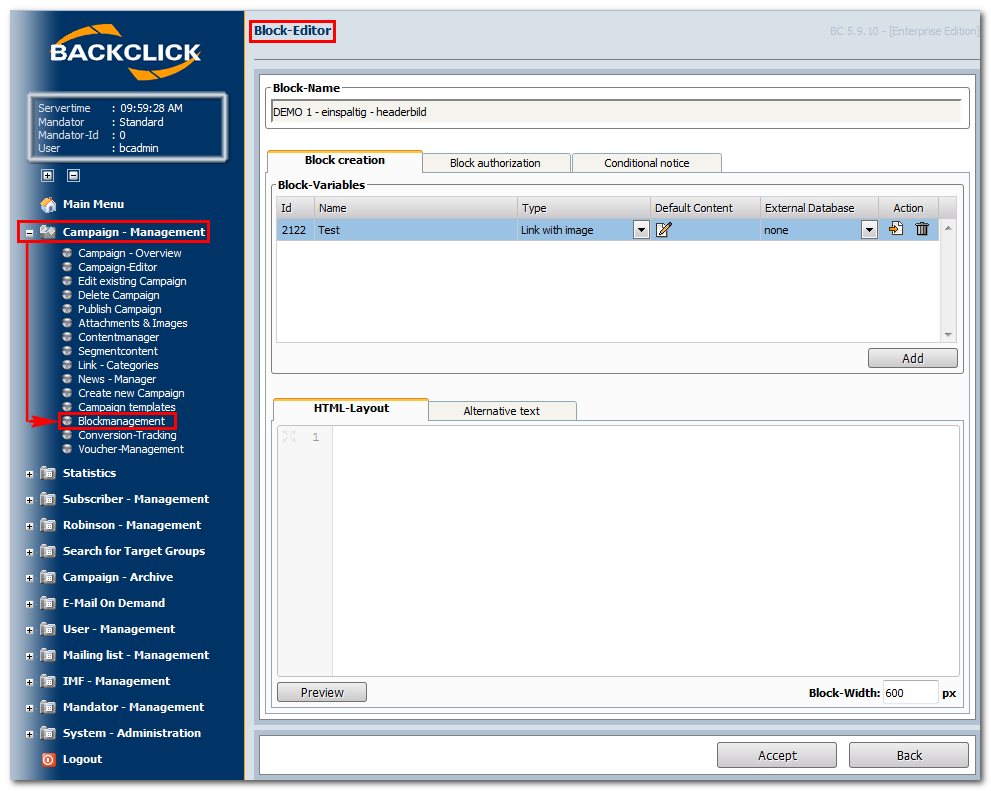
Abb. 11.6.2.1- Block - Editor -> Block-Erstellung
Block - Name
Create a name for the block, one that is easy to remember. Numbers, letters, and special signs may be used.
Index Tab: Create Block
Block - Variables
Variables used as placeholders in the HML code can be defined here. They are fast and simple to use, and may be interchanged as required. First, you must assign a name to the variable, and indicate its type. You may choose from among the following:
- Formatted Text: Makes it possible to format the input with an HTML editor
- Picture: Makes it possible to display a picture
- Unformatted Text: Text ONLY. The text gets a default formatting from the HTML side.
- Link with Text: Displays a link and informational text
- Link with Picture: Displays a link and a picture
- Text Input box: Displays any input, including HTML code
The default value depends on the type of variable. The “Default Content” contains the information that will replace the variable later on. This means that you need to define the value indicated in the type of variable here, by inserting text, copying a link, etc. External databases may only be referenced if a connection to these databases is possible.
Block - Layout
Blocks may be designed by using the block variables in text form, as well as in HTML form. Variables are inserted into the block layout by clicking on the "Action"-button. They will be placed at the last position of the mouse cursor. Variables may be used repeatedly. In the block layout, these variables are recognized by the IDs that BACKCLICK produces automatically. (A click on the "Delete"-button erases the variable.)
Both HTML TAGs and simple text may be used. That way, you can insert a completed layout, as well as simple text. Note, however, that the text variant only can be used for sending text newsletters.
Table of content
If you want to include an auto generetad table of content, you just have to insert the following code into the HTML code.
| Code Block |
|---|
<!--TOC-->
<a href="#" id="tocEntry">TOC-ENTRY</a><br>
<!--/TOC--> |
The "TOC"-HTML-Comments, the a-tag with the ID "tocEntry" and the content "TOC-ENTRY" are important. You may style the a-tag as you wish. Backclick will insert all configured newsletter blocks in the table of content automatically. (See here: HTML and Text Campaign Editor (Conten)#Showtheblockinthetableofcontents?)
Table of contents with multiple columns are also posiible. You just have to use the following code as often as needed.
| Code Block |
|---|
<!--TOC-COL-->
<a href="#" id="tocEntry">TOC-ENTRY</a><br>
<!--/TOC-COL--> |
Backclick will split the configured table of content entrys automatically ofer these toc-blocks. For example, you can put these toc-blocks into a table with multiple columns.
Block - Width
You can enter the width of the block in pixels here. You must indicate at least one pixel,
but there are no other limitations. The width in pixels determines the width of the gray bar in the edit view.
Index tab: Block – Authority
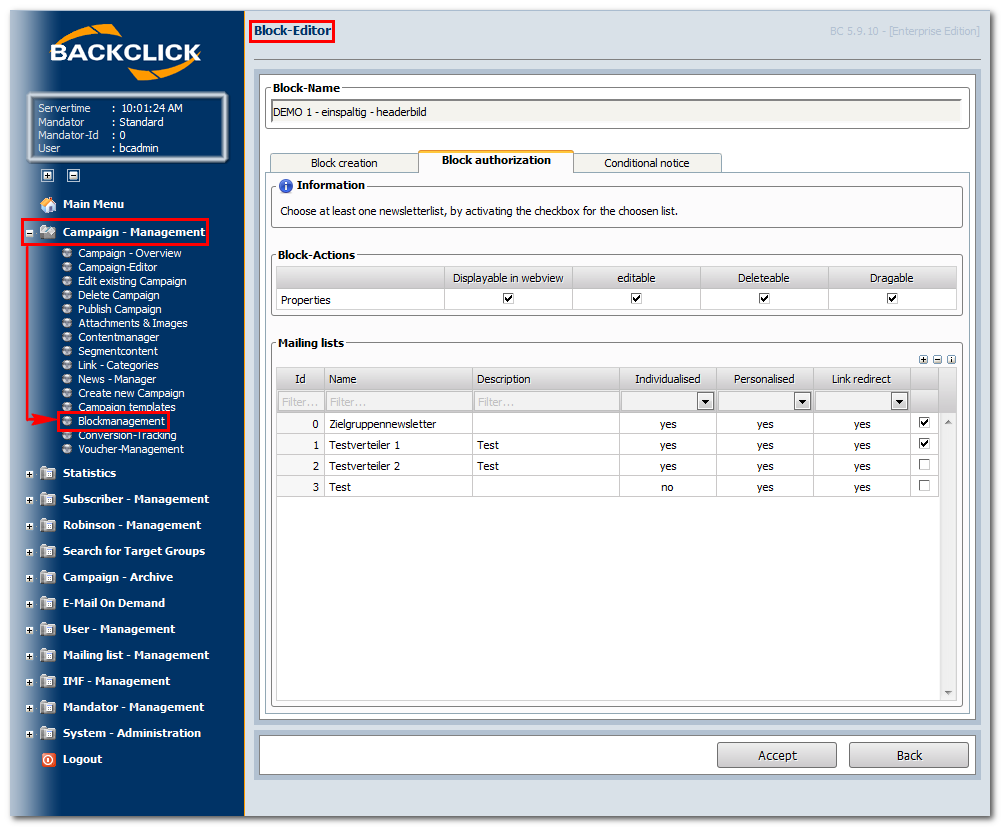
Abb. 11.6.2.2 - Block - Editor -> Block-Berechtigung
Block-Actions
You must select AT LEAST one mailing list, by activating the check box within the corresponding column. The block may be
edited, deleted, or moved. It is possible to give them every authority.
Mailing lists
Here you may select the distribution lists for whom this particular block will be visible and usable. The block can only be used in the newsletter you plan to send to this mailing list if the check box behind the corresponding mailing list is marked.
If all attitudes have been defined, click on the "Accept"-button to save this block in the system. If you do not save the block, a click on the "Back"-button will return you to the Main Menu, “Newsletter editorial staff > block administration”.
Templates
In order to assemble the blocks into a template, click on “Newsletter Presentations”. This will open the following view:
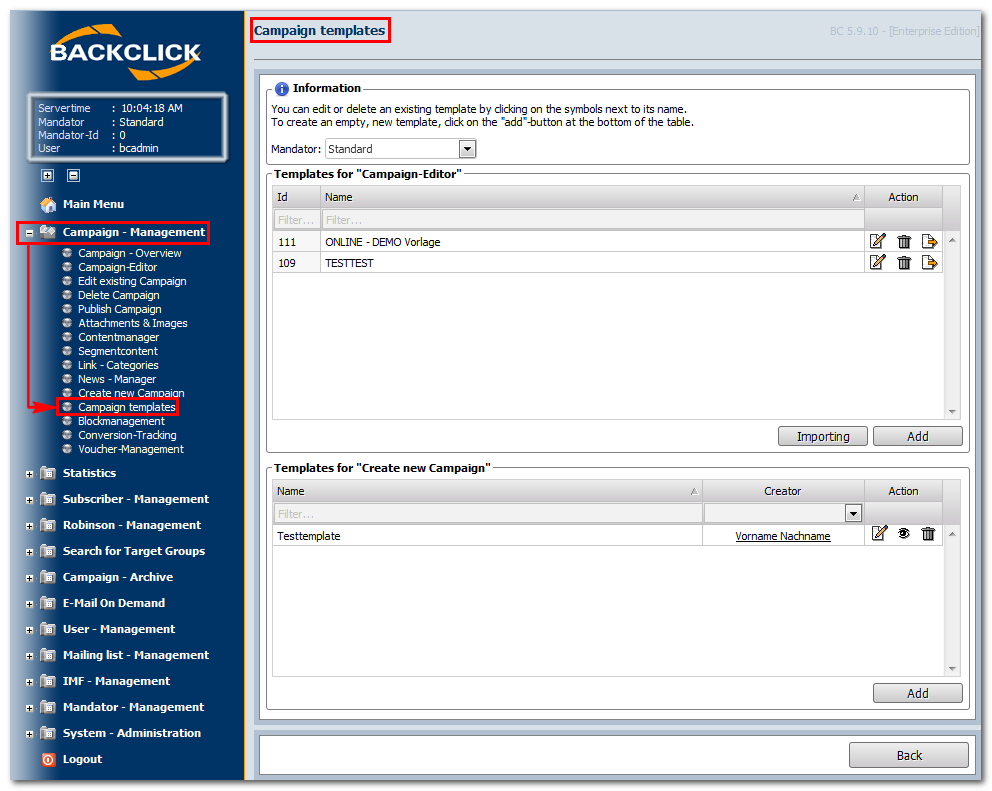
Abb. 11.6.2.3 - Newsletter - Vorlagen (Beispieltemplates)
Newsletter-Templates
All templates that have already been created are listed in this overview. This overview will be empty in the delivery status window, since no blocks are available. Click on the -"Add" button to create a template. This will also open the following input mask:
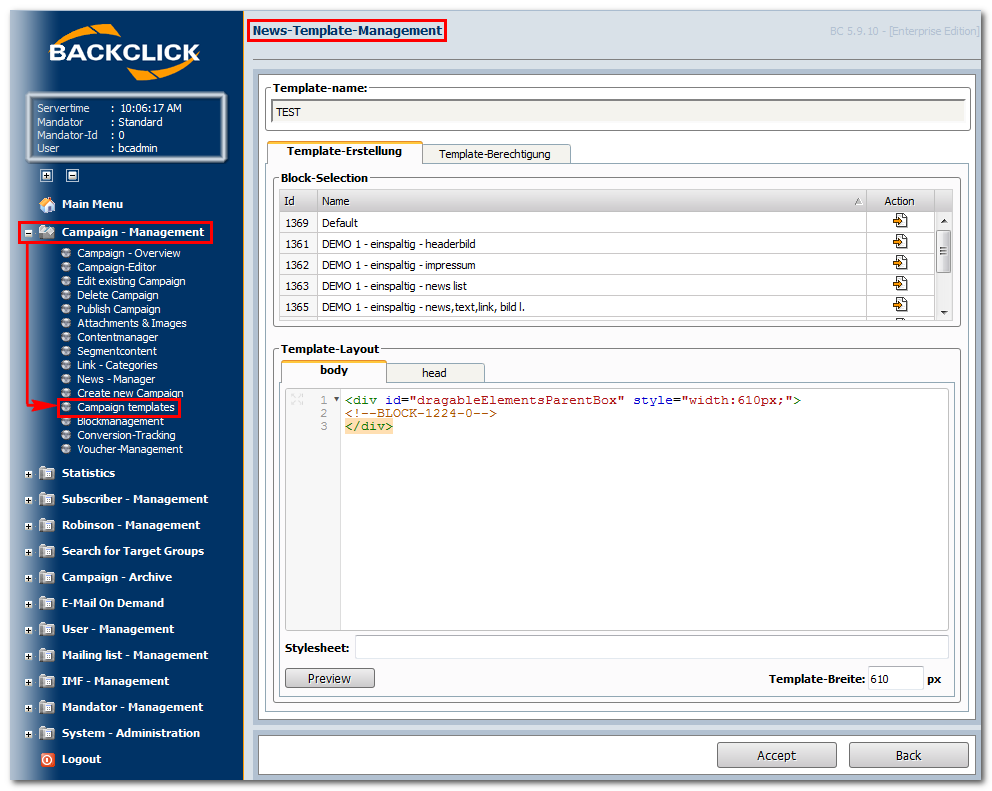
Abb. 11.6.2.4 - Neues Template erstellen
Template-Name
Give the template a name that is easy to remember.
Create a Template/Template Layout
While you are creating the template, all the blocks that are stored in the system will be listed, and may be assigned to the current template. This is done within the menu item, “Template Layout -> body.” The TAG <div id="dragableElementsParentBox" style="width:610px;"></div> is already pre-programmed. This tag should never be erased, because it defines the mobility of the dragable elements. All the blocks may be inserted within this TAG. If you click on the -button, the block you have chosen will be inserted at the last position of the mouse cursor. It will look like this:
<div id="dragableElementsParentBox" style="width:610px;"> <!--BLOCK-77-0--> </div>
At first, all the inserted blocks will be shown in the order in which they were inserted. This order may be changed with the Moving Editor. Style sheets can be inserted within “Template Layout > Head,” in order to format the texts globally. You may also place these style sheets within the body of the template. You will see an input box marked “Style sheet.” If you have entered all of the required information, you can display a preview of your templates in order to check the attitudes. Click on the "Preview"-button to open the preview. The example would then look like this:
If the preview is to your satisfaction, click on the "Accept"-button to save the template in the system. You can still change the settings, however. By clicking on the "Back"-button, you will quit the input mask and return to the main menu (Newsletter Editorial Staff > Newsletter).
To edit a template, click on the -button on the righthand side of the corresponding template name. This will open the input mask with your previous entries for this template. See Chapter “Create new Template” for more information on how to proceed.
To erase a template, click on the "Delete"-button after the template. A confirmation query will be displayed before the template is actually erased.
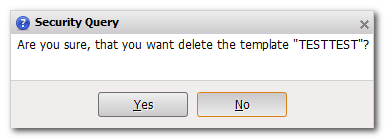
Abb. 11.6.2.5 - Template löschen
To erase a template, click on the "Delete"-button. You will then see a confirmation that the template is being deleted. To stop the process of erasing the template, click on the "No"-button. You will then be returned to the main menu (Newsletter Editorial Staff > Newsletter Templates).