Now that you have finished the Basic settings and created the first mailing list, it is important to create subscribers in your system for the next steps. Our suggestion is picking a few subscribers from your company in order to keep your real subscribers from beeing bothered by trials. First of all, you should add yourself as a subscriber using your own E-Mail address. Please make sure that this E-Mail address is provided in your personal user settings as well.
To create a new subscriber, please click on “Subscriber Management --> Create Subscriber”.

Fig. 3.3.1 - Create Subscriber (Input example)
You may enter all the subscriber's data you have into the corresponding fields. If you want to add more information, you may create new fields using the database designer. All fields of your subscriberdata for the entire system and all mailing lists are defined here. Please read chapter “Database Designer” for further information.
Please enter the E-Mail address of your subscriber here.
Available mailing lists
Every created mailing list is displayed here. The subscriber can be assigned to one or more mailing list(s). This relation defines which newsletter will be sent to this subscriber.
Password
You can define or change the password for any subscriber here. It has to be at least six characters long (numbers, letters, special characters).
Format
Define the format for your newsletter. Options are: Text, HTML, or Text & HTML.
Title / Lastname / Firstname
Enter the subscriber's information into the corresponding fields.
After finishing your entries, click the button "save" at the bottom of the site. The following status report will be shown:
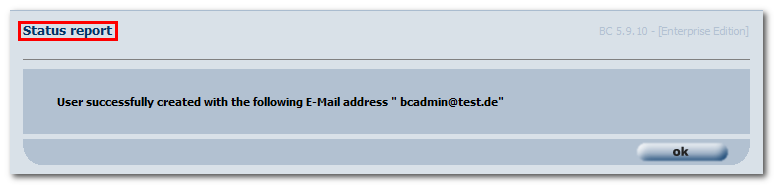
Fig. 3.3.2 - Subscriber created (with input examples)
Afterwards you can access the subscriber database at any time and search for subscribers. In order to do so click “Subscriber Management -> Edit Subscriber”. Enter an entire or parts of an E-Mail address into the field “Search string” and click "Search". The following will be the result:
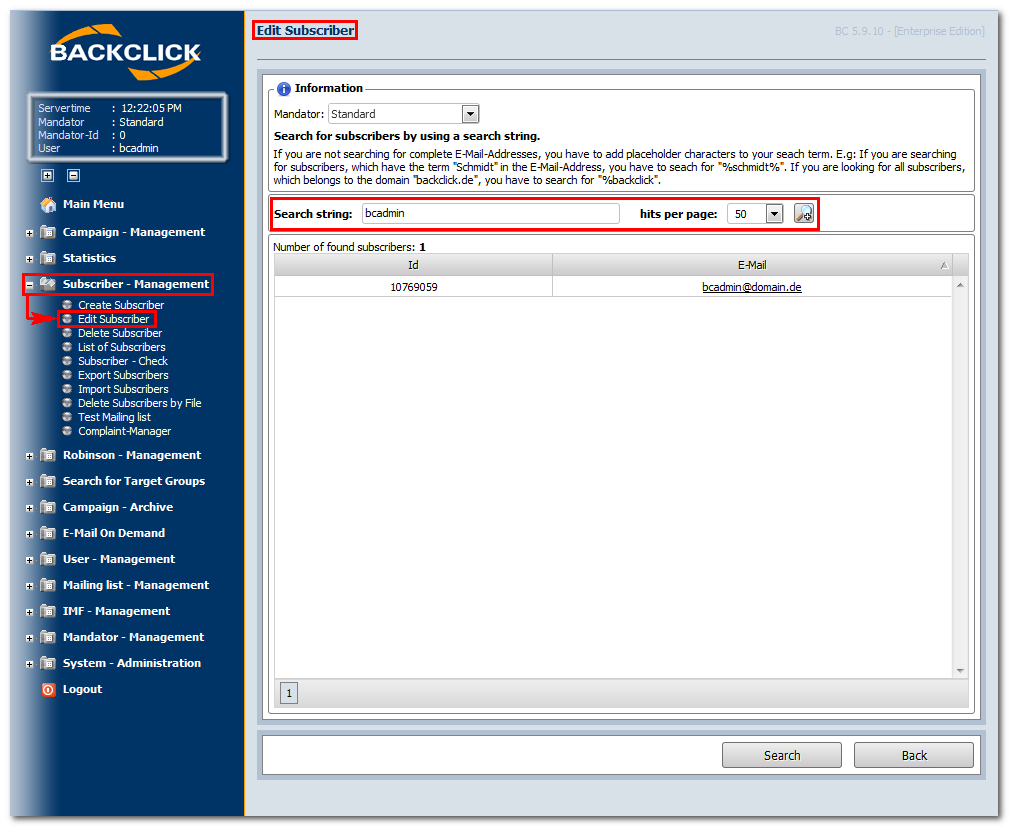
Fig. 3.3.3 - Search for a subscriber
Clicking the E-Mail address displays the subscriber's dataset. You can repeat this procedure with different e-mail addresses as often as you want.
 = Clicking this symbol opens the extended search mask. The more information you have, the more specific the results will be. The following options are available:
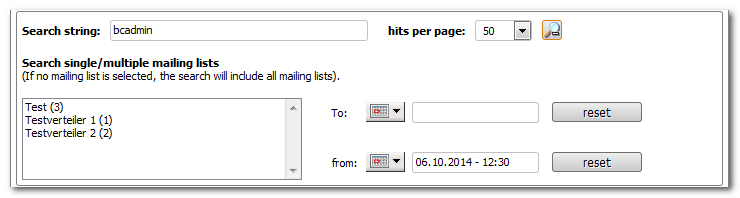
Fig. 3.3.4 - Extended search for a subscriber
For more information on working with subscriber's data, see chapter Basics of subscriber's data.